KitchenAid Combination Wall Oven Manual: A Comprehensive Guide (Updated 12/16/2025)
This manual details KitchenAid’s innovative 2024-2025 combination wall ovens, offering a blend of features announced March 11, 2024, for optimal performance and reliability.
KitchenAid’s combination wall ovens represent a significant advancement in home cooking technology, unveiled with a new product line on March 11, 2024. These appliances aren’t simply ovens; they’re integrated cooking systems designed to simplify meal preparation and elevate culinary results.
This manual serves as a comprehensive guide to understanding, installing, operating, and maintaining your KitchenAid combination wall oven. We’ll explore the unique features that set these ovens apart, focusing on the benefits of combined functionalities.
Whether you’re a seasoned chef or a novice cook, this resource will empower you to harness the full potential of your oven, ensuring years of reliable performance and delicious meals. Reliability ratings predict performance over five years of ownership.
Understanding Combination Oven Technology
KitchenAid’s combination wall ovens integrate multiple cooking methods into a single appliance, offering versatility beyond traditional ovens. This technology typically combines convection baking with other features like microwave or steam functionalities. The March 11, 2024 announcement highlighted this feature integration.
The core benefit lies in enhanced cooking speed and precision. Convection ensures even heat distribution, while supplemental methods accelerate cooking or maintain moisture. This results in faster roasting, perfectly browned baked goods, and tender, juicy meats.
Understanding how these technologies interact is key to maximizing your oven’s potential. This manual will detail each function and provide guidance on selecting the optimal settings for various recipes, ensuring consistent, high-quality results. Predicted reliability is a key factor.
Key Features & Models
Explore the advanced capabilities of KitchenAid combination wall ovens, including convection, self-cleaning, and pre-programmed modes, as introduced in the 2024 product line.
KitchenAid Combination Oven Model Overview (2024-2025)
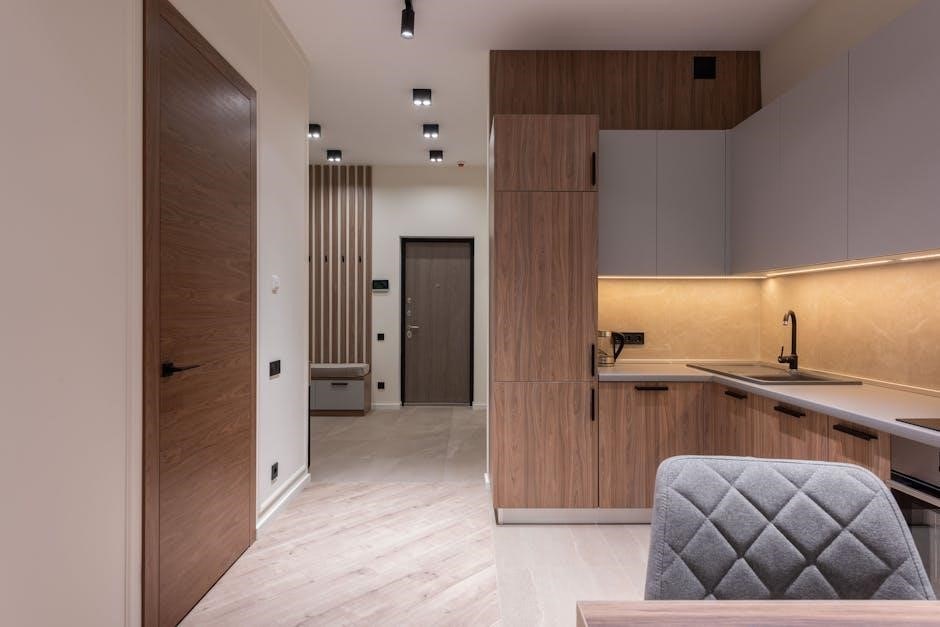
KitchenAid’s 2024-2025 combination wall oven series represents a significant leap in appliance technology, blending multiple cooking functionalities into a single, streamlined unit. The new line, announced in March 2024, focuses on integrating user-favorite features for enhanced convenience.
Models range from standard convection options to those incorporating advanced features like steam-assist baking and precise temperature control. Reliability ratings, based on predicted problem rates over a five-year ownership period, are a key consideration in the design.
Expect variations in capacity, exterior finishes (stainless steel being prominent), and control panel interfaces across the models. Further details regarding specific model numbers and their unique specifications are available through KitchenAid’s official channels.
Convection vs. Traditional Baking Modes
KitchenAid combination ovens offer both traditional and convection baking modes, catering to diverse culinary needs. Traditional baking utilizes static heat, ideal for delicate items like cakes where even, gentle cooking is crucial. Convection, however, employs a fan to circulate hot air, resulting in faster, more uniform cooking.
This circulating air reduces hot spots and lowers cooking temperatures, often by 25°F, saving energy. Convection is particularly effective for roasting meats, baking cookies, and achieving crispy textures.
The combination oven’s versatility allows switching between modes mid-cycle, optimizing results for various recipes. Understanding these differences ensures you leverage the oven’s full potential for consistently delicious outcomes.
Self-Cleaning Functionality & Cycles
KitchenAid combination wall ovens feature robust self-cleaning capabilities, simplifying oven maintenance. These ovens typically offer multiple self-clean cycles, ranging in duration from light cleaning (approximately 2 hours) to heavy cleaning (up to 4 hours), depending on soil accumulation.
The self-clean cycle utilizes high temperatures to burn off food residue, leaving only ash that can be easily wiped away. Before initiating a self-clean cycle, remove all racks, cookware, and any loose debris.
Ensure proper ventilation during the cycle, as it may produce odors. Refer to the oven’s control panel for specific cycle options and safety precautions. Regular use of the self-clean function maintains optimal oven performance.
Installation & Setup
Proper installation is crucial for optimal performance. Professional installation is recommended, ensuring adherence to electrical requirements and safety standards for your new oven.
Professional Installation Recommendations
Engaging a qualified technician is highly advised for the installation of your KitchenAid combination wall oven. This ensures compliance with local electrical codes and gas regulations (if applicable), preventing potential hazards.
A professional will accurately assess the existing electrical infrastructure, verifying sufficient amperage and proper grounding. They will also confirm adequate ventilation to prevent overheating.
Proper oven placement is vital, considering clearances for airflow and future servicing. Technicians are skilled in securely mounting the oven, ensuring stability and preventing vibrations during operation. They will also meticulously test all functions post-installation, guaranteeing optimal performance and peace of mind. Ignoring these recommendations could void your warranty.
Electrical Requirements & Safety
KitchenAid combination wall ovens demand specific electrical configurations for safe and efficient operation. Typically, a dedicated 240V electrical circuit with a minimum amperage of 30-50 amps is required – consult your model’s specifications.
Never attempt to modify the power cord or plug; this poses a severe electrocution risk. Ensure the oven is properly grounded to prevent shocks. Disconnect power at the breaker before any maintenance or cleaning.
Avoid using extension cords or adapters. If the power cord is damaged, it must be replaced by a qualified technician. Always prioritize safety; improper electrical connections can lead to fire hazards or damage the oven’s internal components. Adherence to these guidelines is crucial for a secure installation.
Initial Setup & Calibration
Upon installation, several initial setup steps are vital for optimal KitchenAid combination wall oven performance. Begin by removing all packing materials, both inside and outside the oven cavity. Then, perform a thorough inspection for any shipping damage.
Next, calibrate the oven temperature using a separate oven thermometer to ensure accuracy. This process, detailed in the control panel settings, adjusts the internal thermostat. Run a self-clean cycle initially to eliminate manufacturing residue and odors.
Familiarize yourself with the control panel and pre-programmed cooking modes. Proper calibration and initial cleaning guarantee consistent cooking results and extend the oven’s lifespan. Refer to the full manual for detailed calibration instructions specific to your model.
Operating Instructions
Mastering your KitchenAid combination wall oven involves navigating the control panel, setting precise temperatures and times, and utilizing the diverse pre-programmed cooking modes efficiently.
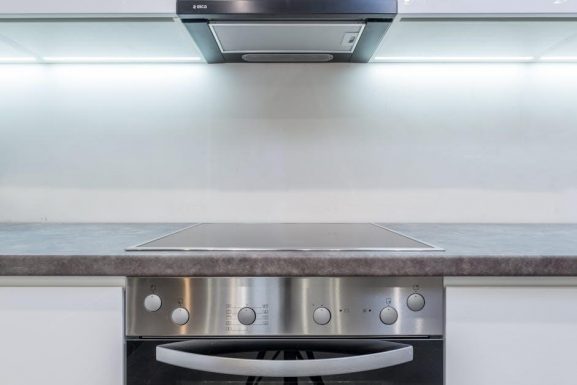
Control Panel Navigation & Display
The KitchenAid combination wall oven’s control panel is designed for intuitive operation. A full-color touchscreen display presents all available cooking modes, temperature settings, and timer functions. Utilize the directional arrows to scroll through options, and the ‘Select’ button to confirm your choices.
Key icons indicate specific features, such as convection bake, broil, and self-clean. The display also provides real-time oven temperature and remaining cook time. For customized cooking, explore the ‘My Recipes’ function to save preferred settings.
Alerts and notifications appear on the screen, signaling preheating completion or cycle endings. Familiarize yourself with the panel’s layout for a seamless cooking experience. Refer to the detailed diagram within this manual for specific icon definitions and button functionalities.
Setting Temperature & Cooking Time
Adjusting temperature on your KitchenAid combination wall oven is straightforward. Use the up and down arrow keys on the control panel to select your desired cooking temperature, displayed in Fahrenheit or Celsius (adjustable in settings). Confirm your selection with the ‘Start’ button.
Setting the cooking time is equally simple. Navigate to the ‘Timer’ function and input the desired duration using the numeric keypad. You can also utilize the ‘Delay Start’ option to schedule cooking for a later time;
Precise temperature control is crucial for optimal results. The oven maintains consistent heat throughout the cooking process. Always refer to recipe guidelines for recommended temperatures and times, and adjust as needed.
Using Pre-programmed Cooking Modes
KitchenAid combination wall ovens feature a suite of pre-programmed cooking modes designed for convenience and optimal results. These modes, accessible via the control panel, include Bake, Broil, Roast, Convection Bake, and more.
Selecting a mode automatically sets the oven to pre-defined temperature and time parameters suited for specific dishes. For example, the ‘Roast’ mode provides consistent, even heating ideal for meats.
Customization is key; while pre-programmed, you can still adjust temperature and cooking time to your preference. Explore each mode to discover its benefits and enhance your culinary experience. Refer to the full manual for detailed descriptions of each pre-set function.

Troubleshooting Common Issues
This section addresses frequent problems with your KitchenAid combination wall oven, including heating failures, control panel errors, and self-clean cycle difficulties.
Oven Not Heating Properly
If your KitchenAid combination wall oven isn’t heating, first verify the power supply and ensure the oven is correctly plugged in. Check the circuit breaker or fuse box for any tripped breakers or blown fuses. Confirm the control panel is set to a baking or roasting mode, and the desired temperature is selected.
A faulty heating element is a common cause; if visibly damaged, it requires replacement by a qualified technician. Also, inspect the igniter (for gas models) – a weak or broken igniter won’t light the burner. Ensure the oven door is fully closed, as a safety interlock prevents operation when ajar.
If the issue persists, consult the full troubleshooting guide or contact KitchenAid customer support for assistance. Do not attempt to repair complex electrical components yourself.
Control Panel Malfunctions
Experiencing issues with your KitchenAid combination wall oven’s control panel? First, try a simple reset: unplug the oven for five minutes, then plug it back in. If the display is unresponsive or showing error codes, consult the error code section of this manual for specific guidance.
Touchscreen issues, like unresponsiveness or inaccurate selections, may require cleaning the screen with a soft, damp cloth. Avoid harsh chemicals. If buttons are stuck or not functioning, do not force them.
For persistent malfunctions, avoid attempting self-repair. Contact KitchenAid customer support, providing the model number and a detailed description of the problem. Professional diagnosis and repair are recommended for complex control panel issues.
Self-Clean Cycle Problems
If your KitchenAid combination wall oven’s self-clean cycle isn’t functioning correctly, first ensure the oven door is completely locked. A failed lock will prevent the cycle from starting. Check for error codes displayed on the control panel, referencing the troubleshooting section for explanations.
Excessive smoke during the self-clean cycle can occur with heavy buildup; ensure large debris is removed beforehand. If the cycle stops prematurely, it may indicate a temperature sensor issue or a tripped circuit breaker.
Never manually open the oven during the self-clean cycle. For persistent problems, contact KitchenAid support, providing the model number and a detailed description of the issue. Professional service is advised for complex self-clean malfunctions.
Maintenance & Care
Regular cleaning preserves your KitchenAid oven’s performance and longevity. Maintaining both the interior and exterior finish ensures optimal functionality and aesthetic appeal.
Cleaning the Oven Interior
Maintaining a clean oven interior is crucial for both performance and food safety. KitchenAid combination wall ovens offer various cleaning options, including the self-clean cycle. For lighter cleaning, a damp cloth with mild dish soap is often sufficient. Avoid abrasive cleaners, as they can damage the oven’s surfaces.
Before using the self-clean cycle, remove all racks, cookware, and any loose debris. Ensure the kitchen is well-ventilated during the self-clean process, as it generates high temperatures and may produce odors. After the cycle completes, allow the oven to cool completely before wiping away any remaining ash with a damp cloth.
For stubborn stains, a paste of baking soda and water can be applied, left for a period, and then gently scrubbed. Always refer to the full manual for specific cleaning recommendations related to your model.
Maintaining the Exterior Finish
Preserving the sleek appearance of your KitchenAid combination wall oven requires regular, gentle care. The exterior finish, often stainless steel or a coated material, is susceptible to fingerprints, smudges, and water spots. Use a microfiber cloth dampened with warm water and a mild detergent to wipe down the exterior surfaces.
For stainless steel models, always wipe with the grain to avoid scratching. Specialized stainless steel cleaners are available for a polished look, but ensure they are non-abrasive. Avoid harsh chemicals, scouring pads, or steel wool, as these can permanently damage the finish.
Regular cleaning prevents buildup and maintains the oven’s aesthetic appeal. Promptly address spills and splatters to prevent staining. Refer to your model’s specific manual for recommended cleaning products and techniques.
Replacing Oven Lights
If your KitchenAid combination wall oven’s interior light fails, replacement is a straightforward process, but safety is paramount. Always disconnect the power supply to the oven at the circuit breaker before attempting any repairs. Consult your specific model’s manual for detailed instructions and diagrams, as light bulb access varies.
Typically, oven lights are located behind a protective cover within the oven cavity. Remove the cover carefully, then gently unscrew the old bulb. Use only KitchenAid-approved replacement bulbs with the correct wattage to prevent damage or fire hazards.
Install the new bulb, replace the cover, and restore power. If the light still doesn’t work, consult a qualified appliance technician.
Safety Precautions
Prioritize safety when using your KitchenAid oven. Always follow general guidelines, be aware of carbon monoxide risks, and utilize child safety locks when applicable.
General Safety Guidelines
Before operating your KitchenAid combination wall oven, carefully review these essential safety guidelines. Always ensure the oven is properly installed and grounded by a qualified professional. Never attempt to modify or repair the appliance yourself; contact KitchenAid authorized service for assistance.
Exercise caution when the oven is in use, as surfaces become extremely hot. Utilize oven mitts or pot holders when handling hot cookware. Keep flammable materials away from the oven’s vicinity. Supervise children closely when the oven is operating, and never allow them to play near it.
Avoid using harsh abrasive cleaners on the oven’s exterior or interior, as they can cause damage. Regularly inspect the power cord for any signs of wear or damage. Disconnect the oven from the power supply before cleaning or performing maintenance.
Carbon Monoxide Safety
KitchenAid combination wall ovens are electric and do not produce carbon monoxide. However, it’s crucial to understand the risks associated with fuel-burning appliances in your home. Ensure you have working carbon monoxide detectors installed on every level of your residence, especially near sleeping areas.
Regularly test your carbon monoxide detectors to confirm they are functioning correctly. Familiarize yourself with the symptoms of carbon monoxide poisoning, which include headache, dizziness, weakness, nausea, and confusion. If you suspect carbon monoxide exposure, immediately evacuate the premises and call emergency services.
While your KitchenAid oven doesn’t pose a direct carbon monoxide threat, maintaining overall home safety is paramount. Never use a gas oven or range for heating purposes, and ensure proper ventilation when using fuel-burning appliances.
Child Safety Locks
KitchenAid combination wall ovens are equipped with control panel lock features designed to prevent accidental operation by children. Activate the control lock function through the oven’s settings menu, rendering the buttons unresponsive. This safeguard prevents unintended changes to cooking settings or activation of oven functions.
Always engage the control lock when the oven is not in use, particularly in households with young children. Remind all family members about the lock’s function and how to disengage it when needed. Supervision is still essential; the lock is a preventative measure, not a substitute for adult oversight.
Refer to the ‘Control Panel Navigation & Display’ section for detailed instructions on activating and deactivating the control lock. Prioritize child safety by utilizing this feature consistently.

Warranty Information & Support
KitchenAid provides comprehensive warranty coverage for its combination wall ovens, ensuring peace of mind. Access support and locate replacement parts easily through KitchenAid’s official channels.
KitchenAid Warranty Details
KitchenAid stands behind the quality of its combination wall ovens with a robust warranty program. The standard warranty typically covers defects in materials and workmanship for one year from the date of original purchase. However, specific components, such as the stainless steel interior, may have extended warranty periods – often up to five years for corrosion.
This warranty excludes normal wear and tear, improper installation, misuse, abuse, or alterations. It’s crucial to register your appliance promptly after purchase to activate the full warranty benefits. Proof of purchase is required for all warranty claims. KitchenAid may, at its discretion, repair or replace the defective part or appliance.
For detailed warranty terms and conditions, please refer to the official KitchenAid warranty statement included with your oven or visit the KitchenAid website. Understanding your warranty coverage ensures you receive the support you deserve.
Contacting KitchenAid Customer Support
KitchenAid provides multiple avenues for customers needing assistance with their combination wall ovens. For immediate support, you can reach their dedicated customer service team via phone at 1-800-541-6390. Their representatives are available to address questions regarding operation, troubleshooting, and warranty claims.
Alternatively, KitchenAid offers comprehensive online support through their official website, KitchenAid.com. Here, you’ll find a detailed FAQ section, downloadable manuals, and access to live chat with a support specialist. You can also submit a support request online for non-urgent inquiries.
Social media channels, such as Twitter and Facebook, provide another way to connect with KitchenAid for quick updates and assistance. Ensure you have your model and serial number readily available when contacting support for efficient service.
Finding Replacement Parts
Locating genuine KitchenAid replacement parts for your combination wall oven is crucial for maintaining performance and safety. The official KitchenAid website (KitchenAid.com) offers a dedicated parts store where you can search by model number to find compatible components.
Alternatively, authorized KitchenAid parts distributors, like Sears PartsDirect and AppliancePartsPros, carry a wide selection of oven parts. Always verify the part number before ordering to ensure compatibility with your specific model.

When ordering, have your oven’s model and serial number handy. For complex repairs, it’s recommended to consult a qualified appliance technician to ensure proper installation and avoid potential hazards. Using non-genuine parts may void your warranty.