Singer Stitch Sew Quick Manual: A Comprehensive Guide
Welcome! This detailed manual assists in understanding and utilizing your new Singer Stitch Sew Quick. It’s designed for both beginners and experienced sewers, offering comprehensive instructions and guidance.
Congratulations on acquiring the Singer Stitch Sew Quick! This compact and versatile sewing machine is engineered to deliver reliable performance for a wide array of projects, from simple alterations to creative crafting endeavors. It’s particularly well-suited for beginners, offering an accessible entry point into the world of sewing, yet possesses enough features to satisfy more experienced users.
This machine distinguishes itself through its user-friendly design and straightforward operation. The Singer Stitch Sew Quick aims to simplify the sewing process, removing intimidation and fostering creativity. It’s a fantastic tool for garment construction, home décor projects, quilting, and various DIY applications.
This manual serves as your comprehensive guide, walking you through every aspect of the machine – from initial setup and threading to mastering various stitch techniques and performing routine maintenance. We’ll cover essential functions, troubleshooting tips, and safety precautions to ensure a smooth and enjoyable sewing experience. Prepare to unlock your sewing potential with the Singer Stitch Sew Quick!
Understanding the Machine’s Components
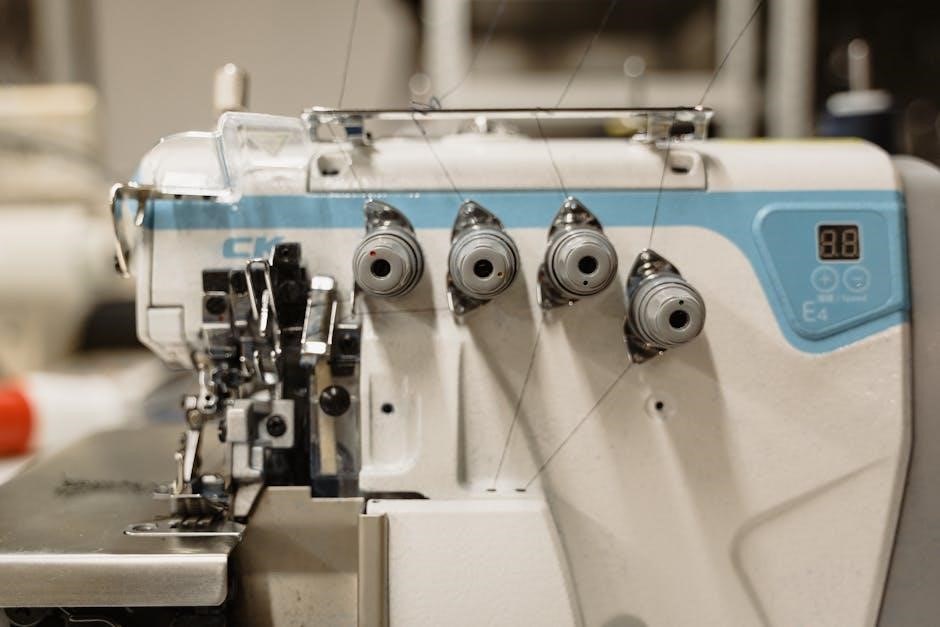
Familiarizing yourself with the Singer Stitch Sew Quick’s parts is crucial for effective operation. The power switch controls the machine’s on/off function, while the foot pedal regulates sewing speed. The handwheel allows for manual stitch control, useful for precise positioning. The stitch selector dial enables you to choose from a variety of stitch patterns.
The bobbin winder prepares the bobbin with thread, and the bobbin case holds it securely. The presser foot applies pressure to the fabric, guiding it through the machine. The presser foot lever raises and lowers the foot. The tension dial adjusts thread tension for optimal stitch quality.
The spool pin holds the thread spool, and the thread guides direct the thread’s path. The needle clamp secures the needle, and the needle plate supports the fabric. Understanding these components and their functions will empower you to confidently operate and maintain your Singer Stitch Sew Quick.
Setting Up Your Singer Stitch Sew Quick
Proper setup ensures smooth and efficient sewing. Begin by placing the machine on a stable, level surface with adequate lighting. Connect the power cord to a grounded outlet and switch the machine on using the power switch. Attach the power cord securely.
Next, install a suitable needle appropriate for your fabric type; ensure it’s firmly secured in the needle clamp. Insert the bobbin, wound with thread, into the bobbin case, following the diagram on the machine. Raise the presser foot using the presser foot lever.
Position your fabric under the presser foot, aligning the edge with the desired seam allowance. Lower the presser foot to secure the fabric. Finally, test the machine with a scrap of fabric to verify correct tension and stitch settings before starting your project. A well-prepared machine is key to successful sewing!
Threading the Machine: A Step-by-Step Guide
Correct threading is crucial for proper stitch formation. Begin by ensuring the machine is turned off. Raise the presser foot and the needle to its highest position. Place the spool of thread on the spool pin. Guide the thread through the thread guide located on top of the machine.
Next, lead the thread down and around the tension discs, ensuring it seats firmly between them. Continue threading through the take-up lever, then down to the needle. Thread the needle from front to back.
Finally, draw a length of thread through the needle eye, about 6-8 inches. Gently pull the thread to confirm it’s properly seated throughout the threading path. Incorrect threading can cause skipped stitches or tension issues, so double-check each step. A properly threaded machine is essential for quality sewing!
Winding the Bobbin
Winding a bobbin correctly ensures smooth, consistent stitching. First, place the spool of thread onto the spool pin. Then, guide the thread through the designated thread guide for bobbin winding. Next, insert the empty bobbin onto the bobbin winder spindle.
Push the bobbin winder to the right and engage it. Hold the thread tail firmly for the first few rotations to prevent slipping. Gently press the foot pedal to begin winding. The machine will automatically stop when the bobbin is full.
Once full, disengage the bobbin winder and remove the bobbin. Trim the thread end. Insert the wound bobbin into the bobbin case, ensuring it clicks into place. Proper bobbin winding is vital for balanced stitch tension and preventing jams during sewing.
Basic Stitch Selection and Adjustment
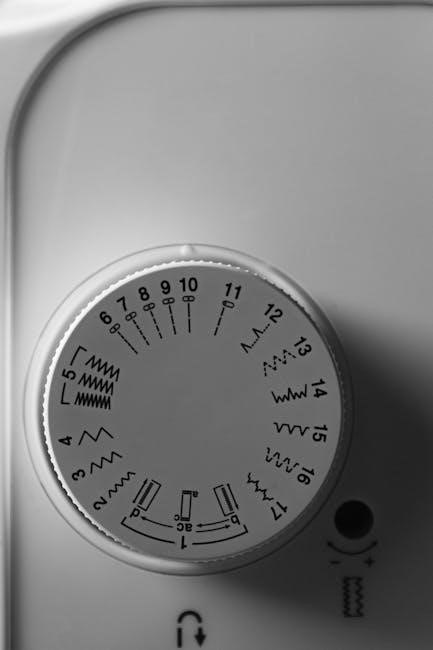
The Singer Stitch Sew Quick offers a variety of stitches for diverse projects. To select a stitch, use the stitch selection dial, rotating it to your desired option – straight, zigzag, or buttonhole. The selected stitch will be displayed in the stitch window.
Stitch length controls the distance between stitches, impacting the fabric’s appearance and strength. Adjust it using the stitch length dial; smaller numbers create shorter stitches, ideal for delicate fabrics, while larger numbers produce longer stitches for heavier materials.
Stitch width applies primarily to zigzag stitches, determining the width of the zig-zag pattern. Use the stitch width dial to adjust. Experiment with different settings to achieve the desired effect. Always test your stitch settings on a scrap fabric before starting your project to ensure optimal results.
Straight Stitch: Mastering the Fundamentals
The straight stitch is the most fundamental stitch, essential for seams, topstitching, and basic construction. Begin by selecting the straight stitch option on your Singer Stitch Sew Quick using the stitch selection dial. Ensure the stitch length is appropriate for your fabric; a medium length (around 2.5mm) is a good starting point for general sewing.
Practice sewing straight lines on scrap fabric. Guide the fabric gently, avoiding pushing or pulling. Maintain a consistent seam allowance using the edge guide or markings on the needle plate. Consistent speed is key – avoid rushing, as this can lead to uneven stitches.
For accurate corners, stop with the needle down, lift the presser foot, pivot the fabric, and continue sewing. Backstitch at the beginning and end of each seam to secure the stitches. Mastering the straight stitch is the foundation for all other sewing techniques.
Zigzag Stitch: Applications and Techniques
The zigzag stitch offers versatility beyond simple seams. Select it on your Singer Stitch Sew Quick via the stitch selection dial. Adjust both the stitch width and stitch length for varied effects. A narrower width is ideal for reinforcing edges, preventing fabric fraying, and creating decorative accents.
Wider zigzag stitches are perfect for stretch fabrics, allowing the seam to stretch with the material. Use it for attaching elastic, creating buttonholes (before using the dedicated buttonhole function), and decorative stitching. Experiment with different width and length combinations on scrap fabric to understand their impact.
When sewing curves with a zigzag stitch, reduce the stitch length for smoother results. Practice controlling the fabric feed to maintain a consistent stitch appearance. The zigzag stitch is a powerful tool for both functional and decorative sewing projects.
Buttonhole Stitch: A Detailed Walkthrough
Creating buttonholes with your Singer Stitch Sew Quick is streamlined with its dedicated buttonhole function. First, attach the buttonhole foot. Select the buttonhole stitch on the stitch selection dial – consult your machine’s diagram for the correct setting. Place your fabric under the presser foot, aligning the buttonhole placement marking with the guide on the foot.
Lower the presser foot and begin sewing. The machine will automatically stitch the first side of the buttonhole. It will stop, prompting you to rotate the fabric. Follow the machine’s cues, rotating as indicated, and continue sewing. The machine will complete the buttonhole, including the tacking stitches.
Carefully remove the fabric and use the buttonhole opener (often included with your machine) to cleanly open the buttonhole. Practice on scrap fabric to perfect your technique and ensure consistent buttonhole size. Always test with a button before finalizing!
Adjusting Stitch Length and Width
The Singer Stitch Sew Quick offers versatile stitch customization through its length and width dials. Stitch length controls the distance between each stitch, impacting fabric strength and appearance. Shorter stitch lengths are ideal for delicate fabrics and intricate details, while longer lengths suit heavier materials and quicker sewing.
To adjust, locate the stitch length dial – typically marked with numbers indicating millimeters. Experiment with different settings on scrap fabric to achieve your desired result. Similarly, the stitch width dial controls the zigzag stitch’s breadth. Wider widths create bolder patterns, while narrower widths offer subtle embellishments.
Remember to adjust these settings based on your fabric type and project requirements. Always test your chosen settings on a scrap piece before sewing your final project. Proper adjustment ensures professional-looking seams and decorative stitching.
Troubleshooting Common Issues
Even with a reliable machine like the Singer Stitch Sew Quick, occasional issues can arise. This section addresses frequent problems and their solutions. A common issue is thread breakage, often caused by incorrect threading, a dull needle, or improper tension. Re-thread the machine carefully, replace the needle, and adjust the tension dial.
Skipped stitches frequently indicate a bent or damaged needle, incorrect needle size for the fabric, or improper threading. Again, check and replace the needle, ensuring it’s appropriate for your material. If problems persist, verify the bobbin is correctly inserted and the thread path is clear.
Consistent tension problems can lead to puckered seams or loose stitches. Adjust the tension dial incrementally, testing on scrap fabric after each adjustment. Always consult the manual for specific troubleshooting steps related to your machine model.
Dealing with Thread Breakage
Thread breakage is a common sewing frustration, but often easily resolved. First, re-thread the entire machine, ensuring the presser foot is up, allowing the thread to seat correctly in the tension discs. A frequently overlooked step is checking the spool pin; ensure the spool rotates freely without catching.
Next, inspect your needle. A bent, dull, or incorrect needle size for your fabric is a primary culprit. Replace it with a new, appropriate needle. Consider the thread type; heavier threads require larger needles. Also, verify the thread isn’t old or brittle, as this weakens it.
Adjust the thread tension. Too much tension can strain the thread, causing it to snap. Loosen the top tension slightly and test on scrap fabric. Finally, ensure the bobbin is wound evenly and inserted correctly. Consistent breakage suggests a deeper issue; consult the full manual.

Fixing Skipped Stitches
Skipped stitches can disrupt your sewing project, but are often straightforward to fix. The most common cause is an improperly inserted or damaged needle. Replace the needle with a new one of the correct type and size for your fabric. Ensure it’s fully pushed up into the needle clamp.
Re-thread the machine, paying close attention to the thread path and ensuring the thread is securely seated in the tension discs. A poorly threaded machine won’t form proper stitches. Also, check the bobbin; ensure it’s wound evenly and inserted correctly, with the thread running in the right direction.
Adjust the presser foot pressure. Too much or too little pressure can cause skipped stitches. Experiment with different settings on scrap fabric. Finally, verify your fabric isn’t too thick for the needle or machine. If problems persist, consult the comprehensive manual for detailed troubleshooting.
Advanced Techniques with the Singer Stitch Sew Quick
Unlock your creativity with the Singer Stitch Sew Quick’s advanced capabilities! Beyond basic stitches, explore decorative stitching for embellishing projects – experiment with various patterns to add unique flair to garments and home décor. Mastering free-motion quilting allows for intricate designs and personalized textures, requiring a drop feed foot and practice.
Appliqué techniques become easier with the machine’s precision. Utilize the zigzag stitch for secure and decorative appliqué edges. Consider using different presser feet, like the satin stitch foot, for specialized applications. Don’t forget to explore monogramming; create personalized gifts and add a professional touch to your creations.
Layered fabric techniques, such as quilting and patchwork, are simplified with consistent stitch quality. Remember to adjust stitch length and width for optimal results. Refer to online resources and advanced sewing guides to further expand your skillset and discover new possibilities.
Maintaining Your Machine for Longevity
Regular maintenance is crucial for ensuring your Singer Stitch Sew Quick operates smoothly for years to come. Dust and lint removal should be a routine practice; use the brush accessory after each sewing session and periodically vacuum around the bobbin area. Oil key components – follow the machine’s diagram for lubrication points, using only sewing machine oil.
Clean the feed dogs to prevent fabric build-up, impacting stitch quality. Inspect the needle regularly for bends or damage, replacing it as needed. A dull needle can cause skipped stitches and fabric damage. Proper storage is also vital; cover the machine to protect it from dust when not in use.
Annual servicing by a qualified technician is recommended for a thorough cleaning and inspection. This proactive approach can prevent major issues and extend the machine’s lifespan. Always refer to your manual for specific maintenance instructions tailored to your Singer Stitch Sew Quick model.
Safety Precautions and Best Practices
Prioritize safety when operating your Singer Stitch Sew Quick. Always disconnect the power supply before threading, changing the needle, or performing any maintenance. Keep fingers away from the needle while sewing; use the needle plate as a guide. Never pull fabric while the machine is running, as this can cause injury or damage.
Ensure adequate lighting to clearly see your work and avoid eye strain. Use the correct needle for your fabric type to prevent breakage and ensure optimal stitch quality. Avoid sewing over pins, as they can damage the needle and machine. Always supervise children when they are near the sewing machine;
Read the manual thoroughly before use to understand all safety features and operating procedures. Store the machine in a safe, dry location, out of reach of children. Following these precautions will ensure a safe and enjoyable sewing experience with your Singer Stitch Sew Quick.
Resources and Further Learning
Expand your sewing skills beyond this manual! Singer’s official website (www.singer.com) offers a wealth of resources, including downloadable manuals, FAQs, and troubleshooting guides specifically for the Stitch Sew Quick. Explore their online community forums to connect with fellow sewing enthusiasts and share tips and projects.
YouTube channels dedicated to sewing provide visual tutorials and demonstrations. Search for “Singer Stitch Sew Quick tutorials” to find helpful videos covering various techniques. Consider enrolling in a local sewing class to receive personalized instruction and learn advanced skills. Many fabric stores offer beginner-friendly workshops.
Online sewing blogs and websites offer inspiration, patterns, and detailed instructions. Don’t hesitate to consult these resources to broaden your knowledge and discover new creative possibilities with your Singer Stitch Sew Quick. Remember to always practice safe sewing techniques!