
Oster Roaster Oven Manual: A Comprehensive Guide
Welcome! This comprehensive guide provides detailed instructions for your Oster Roaster Oven‚ offering a downloadable PDF version for easy access to all features and safety precautions․
Find original user guides‚ troubleshooting tips‚ and warranty information – ensuring optimal performance and enjoyment of your new kitchen appliance․
Save these instructions for future reference and explore recipes designed specifically for your Oster oven!
Congratulations on choosing an Oster Roaster Oven! This versatile appliance expands your cooking capabilities‚ offering a convenient alternative to traditional ovens‚ especially during holidays or when entertaining․ The Oster Roaster Oven is designed for roasting‚ baking‚ and warming‚ providing consistent temperatures and ample space for large meals․
This manual serves as your complete guide‚ detailing everything from initial setup and safe operation to cleaning and troubleshooting․ Whether you’re a seasoned chef or a novice cook‚ this oven simplifies meal preparation․ You’ll find detailed instructions‚ cooking time suggestions‚ and helpful tips to ensure delicious results every time․
Before first use‚ please carefully review the safety precautions outlined within this manual․ Accessing the official PDF version of the manual provides optimized viewing and easy reference․ Enjoy the convenience and versatility of your new Oster Roaster Oven!
Understanding Your Model: Identifying Features
Your Oster Roaster Oven boasts several key features designed for optimal performance․ Familiarizing yourself with these components will enhance your cooking experience․ The oven includes a spacious roasting pan‚ typically accompanied by a convenient roasting rack‚ allowing for even cooking and easy drippings collection․
A durable lid securely covers the oven‚ retaining heat and moisture․ The exterior features a heat-resistant housing‚ though caution is advised as it retains residual heat after use․ The control panel‚ detailed in a later section‚ allows precise temperature and time adjustments․
Many models include a self-basting feature‚ simplifying the process of keeping your roasts moist․ Refer to the downloadable PDF manual for a detailed diagram of your specific model’s components․ Understanding these features ensures safe and efficient operation of your Oster Roaster Oven․
Safety Precautions and Important Warnings
Important: Always prioritize safety when operating your Oster Roaster Oven․ The oven body retains significant heat during and after cooking; avoid touching it immediately after use to prevent burns․ Allow ample cooling time before handling․
Never immerse the oven base‚ cord‚ or plug in water or other liquids․ Ensure the oven is placed on a stable‚ heat-resistant surface away from flammable materials․ Do not operate the oven with a damaged cord or plug‚ and always unplug it when not in use and before cleaning․

Exercise caution when handling the hot roasting pan and rack․ Refer to the PDF manual for complete safety guidelines․ Supervise children when the oven is in operation․ Failure to follow these precautions could result in injury or damage․ SAVE THESE INSTRUCTIONS for future reference․
Getting Started: Initial Setup
Before your first use‚ carefully unpack your Oster Roaster Oven and remove all packaging materials․ Inspect the oven for any visible damage․ Wash the roasting pan and rack with warm‚ soapy water‚ then dry thoroughly – these components are typically removable for easier cleaning․
Place the oven on a stable‚ heat-resistant surface with adequate ventilation․ Before plugging in‚ ensure your outlet voltage matches the oven’s specifications․ It’s recommended to run the oven empty for approximately 15-20 minutes on a medium temperature setting to burn off any manufacturing residue․
Consult the downloadable PDF manual for detailed setup instructions specific to your model․ Familiarize yourself with the control panel and its functions․ Following these initial steps will ensure optimal performance and longevity of your Oster Roaster Oven․
Component Overview: Roasting Pan‚ Rack‚ and Lid
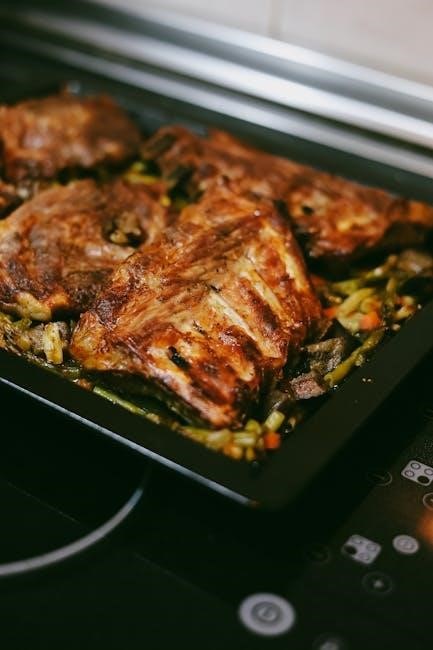
Your Oster Roaster Oven includes three primary components: the roasting pan‚ the rack‚ and the lid․ The roasting pan‚ typically constructed from durable steel‚ is where the food is placed for cooking․ It’s designed for even heat distribution and easy cleaning․
The rack elevates the food above the pan’s base‚ allowing for air circulation and preventing sticking․ This is particularly useful for roasting meats‚ promoting crispy skin and even cooking․ The lid‚ usually made of metal or glass‚ traps heat and moisture‚ ensuring efficient roasting․
Refer to your Oster oven’s PDF manual for specific details regarding the materials and care instructions for each component․ Proper understanding of these parts is crucial for maximizing the oven’s functionality and achieving optimal cooking results․

Understanding the Control Panel
The Oster Roaster Oven’s control panel is designed for intuitive operation․ Typically‚ you’ll find a temperature control dial‚ allowing you to select the desired cooking temperature‚ often ranging from a warming setting to 450°F (232°C)․ A timer function enables you to set a specific cooking duration‚ automatically shutting off the oven upon completion․
Some models feature settings for specific functions like “Baste” or “Warm‚” enhancing cooking convenience; Refer to your Oster oven’s instruction manual – available as a PDF download – for a detailed explanation of each control and its corresponding function․
Familiarizing yourself with the control panel is essential for precise temperature management and achieving perfectly cooked meals․ Always consult the manual for model-specific features and operating guidelines․

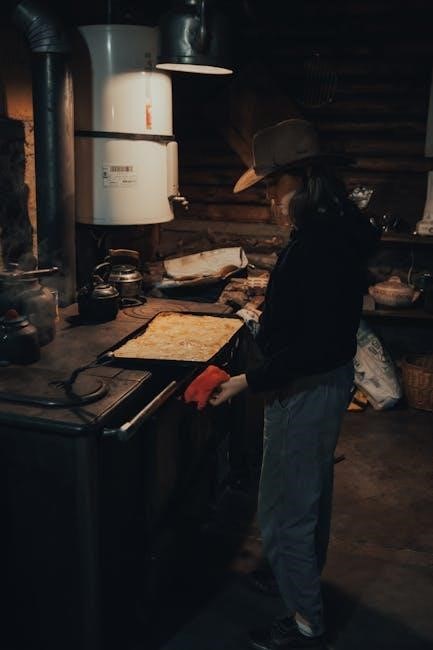
Using Your Oster Roaster Oven: Basic Operation
To begin‚ ensure the Oster Roaster Oven is placed on a stable‚ heat-resistant surface․ Place your prepared food inside the roasting pan‚ then position the pan and rack securely within the oven cavity․ Close the lid firmly․
Using the control panel‚ set the desired temperature and cooking time․ Refer to the Oster oven’s instruction manual (available as a PDF) for recommended settings for various foods․ The oven will begin heating‚ and the timer will initiate the countdown․
Periodically check the food’s progress‚ but minimize lid openings to maintain consistent temperature․ Once the timer expires‚ the oven will automatically shut off․ Carefully remove the roasting pan‚ using oven mitts‚ as surfaces will be hot․ Always consult the manual for specific operating instructions and safety guidelines;
Temperature Settings and Guide
The Oster Roaster Oven offers a versatile temperature range‚ typically from 150°F to 450°F (65°C to 232°C)․ Lower temperatures are ideal for slow cooking and keeping food warm‚ while higher temperatures are suited for roasting and baking․
Consult your Oster oven’s instruction manual – readily available as a PDF download – for a detailed temperature guide․ This guide provides specific recommendations for various dishes‚ including poultry‚ meats‚ and casseroles․
Generally‚ poultry benefits from temperatures between 325°F and 375°F (163°C and 190°C)‚ while beef and pork often require 300°F to 350°F (149°C to 177°C)․ Always use a meat thermometer to ensure food reaches a safe internal temperature․ Remember to adjust cooking times based on the weight of the food and desired level of doneness․
Cooking Times for Common Foods (Turkey‚ Chicken‚ Ham)
Estimating cooking times in your Oster Roaster Oven depends on the weight of the food and the selected temperature․ Refer to your Oster oven’s manual‚ often found as a convenient PDF‚ for precise guidelines․
A 12-14 pound turkey typically requires 3-4 hours at 325°F (163°C)․ Whole chickens (4-6 pounds) usually cook in 1․5-2․5 hours at the same temperature․ Ham cooking times vary significantly; a fully cooked ham needs approximately 10-14 minutes per pound at 325°F (163°C) to reheat․
These are approximate times – always verify internal temperature with a meat thermometer․ Remember‚ an Oster roaster oven may cook slightly faster than a conventional oven․ Online resources and the official instruction manual offer detailed charts for various cuts and weights․
Roasting a Turkey: Step-by-Step Instructions
Preparing to roast a turkey in your Oster Roaster Oven begins with thawing – ensure it’s fully thawed before proceeding․ Preheat the oven to 325°F (163°C)‚ referencing your Oster oven’s manual (available as a PDF download) for specific temperature settings․
Place the turkey on the roasting rack inside the roasting pan․ Season generously‚ inside and out․ Add about one cup of broth or water to the bottom of the pan to maintain moisture․ Cover the turkey loosely with a lid or aluminum foil for the initial cooking period․
Baste periodically‚ especially if not using the self-basting feature․ Check the internal temperature with a meat thermometer; it should reach 165°F (74°C) in the thickest part of the thigh․ Let the turkey rest for 20-30 minutes before carving‚ following the instruction manual’s guidance․
Preparing the Turkey for Roasting
Proper turkey preparation is crucial for a delicious roast using your Oster Roaster Oven․ Begin by fully thawing the turkey – allow ample time‚ referencing the Oster oven manual for suggested thawing times based on weight․ Remove the giblets and neck from the cavity․
Rinse the turkey inside and out with cold water and pat it completely dry with paper towels․ This ensures crispy skin․ Season generously with your preferred herbs‚ spices‚ and seasonings‚ both under the skin and inside the cavity․ Consider adding aromatics like onions‚ celery‚ and carrots to the cavity for enhanced flavor․
For optimal results‚ you can brine the turkey beforehand‚ consulting the instruction manual or online resources for brining recipes․ Ensure the turkey is dry before placing it in the Oster roaster oven for even cooking․
Maintaining Moisture During Roasting
Keeping your turkey moist during roasting in the Oster Roaster Oven is essential for a tender and flavorful result․ Utilize the oven’s self-basting feature‚ if equipped‚ as detailed in your Oster oven manual․ This feature continuously bathes the turkey in its own juices․
If your model doesn’t have self-basting‚ periodically baste the turkey with pan drippings every 30-45 minutes․ Adding about a cup of broth or water to the bottom of the roasting pan also creates steam‚ helping to maintain moisture․
Covering the turkey loosely with foil for the first portion of the roasting time can also prevent excessive drying․ Refer to the instruction manual for specific timing recommendations․ Monitoring the internal temperature with a meat thermometer‚ as outlined in the guide‚ is key to preventing overcooking and dryness․
Self-Basting Feature: How it Works
Many Oster Roaster Oven models include a convenient self-basting feature designed to continuously baste the food as it cooks‚ ensuring a moist and flavorful outcome․ This system typically involves a dedicated well or reservoir within the roasting pan․
As the oven heats‚ liquids placed in this well – often melted butter‚ broth‚ or pan drippings – are gently warmed and circulated over the food․ Consult your Oster oven manual for the specific location of the basting well in your model․
The instruction manual will detail how much liquid to add and when․ This eliminates the need for manual basting‚ freeing you to focus on other aspects of meal preparation․ Properly utilizing this feature‚ as described in the PDF guide‚ guarantees a succulent roast every time․

Cleaning and Maintenance
Proper cleaning and maintenance are crucial for extending the life of your Oster Roaster Oven․ Always unplug the oven and allow it to cool completely before cleaning․ The roasting pan and rack are typically removable for easier washing – refer to your instruction manual for specific removal instructions․
Both the pan and rack can usually be washed with warm‚ soapy water‚ or placed in the dishwasher if dishwasher-safe (check your Oster oven PDF guide)․ Avoid abrasive cleaners‚ as they can damage the non-stick coating․
Wipe the interior of the oven with a damp cloth․ The exterior can be cleaned with a mild detergent․ Regularly cleaning prevents buildup and ensures optimal performance․ Detailed instructions for thorough cleaning are available in the original user guide․
Removing and Cleaning the Roasting Pan and Rack
Removing the Roasting Pan and Rack: Ensure the Oster Roaster Oven is completely cool and unplugged before attempting removal․ Gently lift the roasting pan straight up and out of the oven cavity․ The rack will lift out separately․ Consult your instruction manual for model-specific details‚ as some designs may vary․
Cleaning: Wash both the roasting pan and rack with warm‚ soapy water․ For stubborn food residue‚ allow to soak before scrubbing․ Dishwasher use is permissible if indicated in your Oster oven’s PDF user guide․ Avoid abrasive cleaners or scouring pads‚ which can damage the surface;
Thoroughly dry both components before reassembling and storing․ Proper cleaning maintains hygiene and prevents food odors․ Refer to the manual for detailed instructions and care tips․

Troubleshooting Common Issues
Oven Not Heating: First‚ verify the unit is properly plugged in and the outlet is functioning․ Check the control panel to ensure the desired temperature is set and the timer‚ if applicable‚ is engaged․ Consult the Oster Roaster Oven manual for specific reset instructions․
Temperature Inaccuracies: Allow the oven sufficient preheating time․ If discrepancies persist‚ avoid opening the door frequently during cooking‚ as this releases heat․ Ensure the roasting pan is correctly positioned․ Refer to the PDF user guide for calibration guidance‚ if available․
For further assistance‚ explore online resources or contact Oster support․ Detailed troubleshooting steps are often included in the original instruction manual‚ offering solutions to common problems and ensuring optimal performance of your appliance․

Oven Not Heating
If your Oster Roaster Oven isn’t heating‚ begin by confirming it’s securely plugged into a working electrical outlet․ Test the outlet with another appliance to rule out a power supply issue․ Double-check the control panel settings; ensure a temperature is selected and the timer‚ if used‚ is properly set according to the instruction manual․
Review the Oster user guide for specific reset procedures‚ as some models have a reset button or sequence․ Verify the heating element isn’t visibly damaged․ If the problem persists‚ avoid attempting self-repair; consult the downloadable PDF for detailed safety warnings․
Contact Oster customer support for further assistance‚ referencing your model number․ Proper troubleshooting‚ guided by the manual‚ can quickly resolve this common issue․
Temperature Inaccuracies
Experiencing temperature inconsistencies with your Oster Roaster Oven? First‚ ensure the oven door is securely closed during operation‚ as heat loss can affect internal temperature․ Allow the oven sufficient preheating time‚ as indicated in the instruction manual‚ before placing food inside․
Consider the volume and density of the food being cooked; larger items require longer to reach the set temperature․ If inaccuracies persist‚ verify the oven is placed on a level surface‚ away from drafts․ Refer to the downloadable PDF user guide for calibration instructions‚ if available for your model․
For significant or ongoing discrepancies‚ contact Oster customer support‚ providing your model number․ Accurate temperature control is crucial for safe and effective cooking‚ so consult the manual for optimal results․
Finding the Official Oster Roaster Oven Manual (PDF Download)
Accessing the official Oster Roaster Oven Manual in PDF format is straightforward! Several online resources offer optimized downloads for various models․ Begin by visiting the Oster website and navigating to their support or customer service section․ Utilize the search function‚ entering your specific model number for precise results․
Alternatively‚ websites like ManualsBase host a collection of Oster manuals‚ including those for roaster ovens․ Ensure the PDF is from a reputable source to guarantee authenticity and accuracy․ If you encounter issues opening the PDF‚ download a PDF viewer application․
The downloadable guide provides detailed instructions‚ safety precautions‚ and troubleshooting tips‚ empowering you to maximize your oven’s functionality․ Having the manual readily available ensures a seamless cooking experience!
Warranty Information and Registration

Your Oster Roaster Oven is backed by a manufacturer’s warranty‚ protecting against defects in materials and workmanship․ The duration and specific coverage details vary depending on the model and purchase date; therefore‚ reviewing your warranty card or the official Oster website is crucial․
Registration of your appliance is highly recommended! This process allows Oster to keep a record of your purchase‚ facilitating warranty claims and providing updates on product information or safety recalls․ Registration is typically done online through the Oster website‚ requiring your model number and proof of purchase․
Retain your original purchase receipt as proof of date and location of purchase․ Understanding your warranty terms and completing registration ensures peace of mind and access to support should you encounter any issues with your Oster roaster oven․
Additional Resources and Support
Beyond this manual‚ Oster provides a wealth of resources to enhance your roasting experience․ The official Oster website offers a dedicated support section‚ frequently asked questions (FAQs)‚ and downloadable PDF versions of user manuals for various models‚ including your roaster oven․
For personalized assistance‚ Oster customer service is available via phone or online chat․ Their knowledgeable representatives can address specific questions‚ troubleshoot issues‚ and guide you through the oven’s features․ Online forums and communities dedicated to cooking and Oster appliances also provide valuable peer-to-peer support․
Explore Oster’s website for exclusive recipes tailored for roaster ovens‚ cooking tips‚ and inspiration for your next culinary creation․ Don’t hesitate to utilize these resources to maximize the potential of your Oster Roaster Oven!
Recipes Specifically for Oster Roaster Ovens
Unlock the full potential of your Oster Roaster Oven with a diverse collection of recipes designed specifically for its unique cooking capabilities! Beyond traditional roasting‚ your oven excels at preparing a wide array of dishes‚ from succulent pot roasts and flavorful casseroles to perfectly baked desserts․
Oster’s official website features a dedicated recipe section‚ offering inspiration and step-by-step instructions․ Explore online cooking communities and forums where users share their favorite Oster roaster oven recipes and tips․ Discover innovative ideas for utilizing the self-basting feature and achieving consistently delicious results․
Experiment with different seasonings‚ marinades‚ and cooking times to create personalized masterpieces․ Your Oster Roaster Oven is a versatile tool for effortless and flavorful cooking – let your culinary creativity soar!
Tips for Energy Efficient Roasting
Maximize energy savings while enjoying delicious meals with your Oster Roaster Oven! A key tip is to minimize opening the lid during the cooking process‚ as each opening releases heat and extends cooking time․ Ensure a snug fit when the lid is closed to maintain consistent temperatures․
Utilize the oven’s timer function to automatically shut off the appliance once cooking is complete‚ preventing unnecessary energy consumption․ Consider preheating only when necessary; many recipes don’t require it․ Properly sized roasting pans also contribute to efficiency – avoid using pans that are significantly larger than the food being cooked․
Finally‚ remember that the Oster Roaster Oven generally uses less energy than a conventional oven‚ making it an eco-friendly choice for your cooking needs․ Embrace these simple practices for sustainable and flavorful roasting!