Mr․ Coffee Maker Instruction Manual: A Comprehensive Guide
Welcome! This comprehensive guide details setup, operation, cleaning, and maintenance for your Mr․ Coffee coffeemaker, ensuring flavorful brews and long-lasting performance․
Discover how to utilize features like programmable brewing and the pause & serve function, alongside vital safety information and PDF manual access․
Understanding Your Mr․ Coffee Coffeemaker
Congratulations on choosing Mr․ Coffee! This section introduces you to the core functionality of your new appliance․ Your coffeemaker is designed for simple, reliable operation, delivering consistently delicious coffee with minimal effort․
Familiarize yourself with the basic components – the carafe, filter basket, water reservoir, and warming plate – as described in the parts diagram․ Understanding these elements is crucial for proper setup and maintenance․
Whether you’re brewing a single cup or a full pot, this guide will walk you through each step․ Explore the programmable features to wake up to freshly brewed coffee, and learn how to maximize freshness with the built-in timer․ Remember to consult the official instruction manual (available as a PDF) for detailed information specific to your model․
Model Identification & Series Overview
Identifying your specific Mr․ Coffee model is the first step to accessing the correct support and instruction manual․ Mr․ Coffee offers a diverse range of coffeemakers, each with unique features and capabilities․ Series like the PC12, and others, cater to varying brewing needs and preferences․
Locate the model number, typically found on the underside of the appliance or within the water reservoir․ This number is essential when searching for your PDF manual on the Mr․ Coffee official website․
Understanding your series – whether it’s a basic drip model or a programmable option – will help you unlock its full potential․ The official website provides a lookup tool to streamline the process, ensuring you have the precise instructions for your coffeemaker․
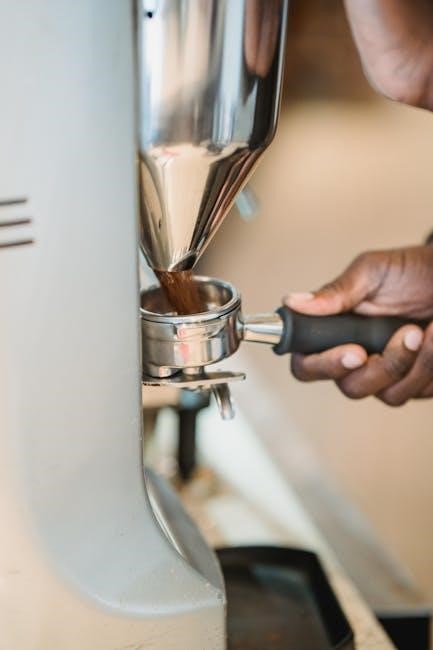
Key Components & Parts Diagram
Your Mr․ Coffee coffeemaker comprises several key components working in harmony to deliver a perfect brew․ These include the water reservoir, responsible for holding the water supply; the filter basket, which securely holds the coffee filter and grounds; and the carafe, designed to collect the brewed coffee․
Essential parts also include the warming plate, maintaining coffee temperature, and the power cord, providing electrical connection․ A detailed diagram within your instruction manual visually identifies each part, aiding in understanding and maintenance․
Familiarizing yourself with these components is crucial for proper operation, cleaning, and troubleshooting․ Refer to the manual for a clear illustration and part names, ensuring safe and effective use of your coffeemaker․

Setting Up Your Mr․ Coffee Maker
Prepare for brewing! This section guides you through initial cleaning, water reservoir filling, filter placement, and safe power cord connection for optimal performance․
Initial Cleaning Before First Use
Before your first delicious brew, a thorough cleaning process is essential to remove any manufacturing residue and ensure the purest coffee flavor․ Begin by washing the carafe, lid, filter basket, and exterior of the coffeemaker with warm, soapy water․
Rinse all components thoroughly, ensuring no soap remains․ It’s also recommended to run a full brewing cycle with water only – without coffee grounds – to flush out the internal system․ Simply fill the water reservoir to the maximum fill line, place the empty filter basket in position, and initiate a brew cycle․
Discard the water from the carafe after the cycle completes․ This initial cleaning prepares your Mr․ Coffee for years of enjoyable coffee making!
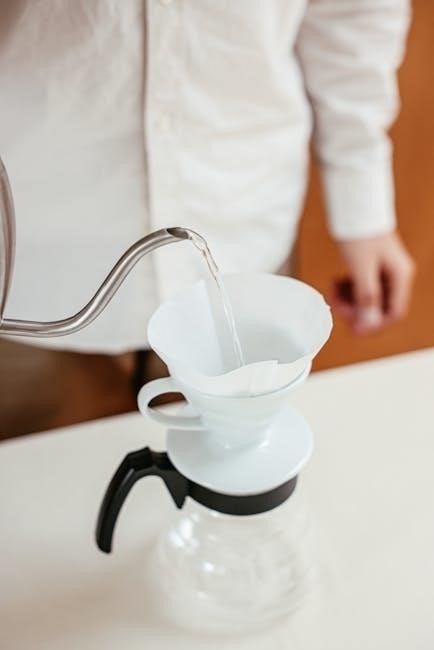
Water Reservoir Filling Instructions
Proper water levels are crucial for optimal brewing․ Locate the water reservoir, typically at the rear or side of your Mr․ Coffee coffeemaker․ Open the reservoir lid and use the water level indicator to accurately measure the desired amount of fresh, cold water․
The indicator displays markings for cup measurements, allowing you to brew the precise quantity you need․ Avoid overfilling beyond the maximum line, as this can cause overflow during brewing․ For best results, use filtered water to minimize mineral buildup and enhance coffee flavor․
Close the reservoir lid securely before initiating the brewing process․ Always ensure the reservoir is properly seated to prevent leaks․
Filter Basket & Filter Types (Paper vs․ Reusable)
Your Mr․ Coffee coffeemaker utilizes a filter basket to hold coffee grounds during brewing․ Locate the basket, usually a swing-out or lift-out component․ You have a choice between paper filters and reusable filters․
Paper filters are disposable, providing a clean and convenient brewing experience․ They help trap oils and sediment, resulting in a clearer cup of coffee․ Ensure you use the correct size filter – typically cone or basket-shaped – as specified in your model’s instructions․
Reusable filters are an eco-friendly alternative, eliminating the need for constant replacements․ They require regular cleaning to prevent buildup and maintain optimal performance․ Thoroughly rinse after each use․
Power Cord Connection & Safety Precautions
Before connecting your Mr․ Coffee maker, ensure the power switch is in the “off” position․ Plug the power cord into a grounded electrical outlet․ Never operate the appliance with a damaged cord or plug․ Avoid using extension cords; if necessary, use a heavy-duty extension cord․
Safety is paramount! Do not immerse the appliance, cord, or plug in water or other liquids․ Always unplug the coffeemaker before cleaning․ Keep the appliance away from heat sources and flammable materials․ Supervise children when the coffeemaker is in operation․
Caution: The exterior surfaces may become hot during brewing․ Allow the coffeemaker to cool completely before handling or cleaning․
Brewing Coffee: Basic Operation
Enjoy fresh coffee! This section guides you through adding grounds, setting the clock, brewing a single cup, or a full pot – simple and delicious!
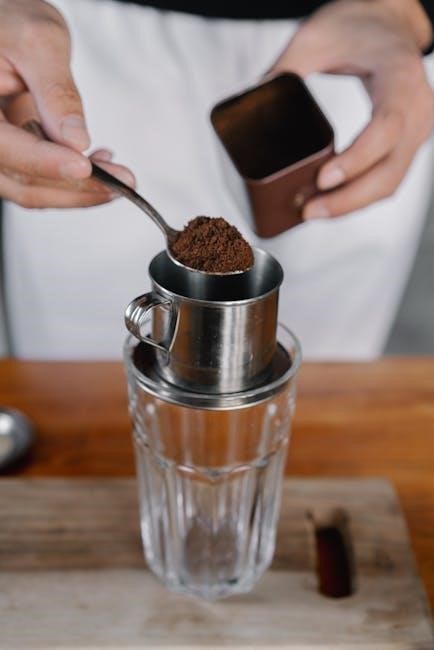
Adding Coffee Grounds – Recommended Amounts
Achieving the perfect brew starts with the right coffee-to-water ratio․ For optimal flavor, Mr․ Coffee recommends approximately one tablespoon of ground coffee per five ounces of water․
This is a general guideline; adjust to your personal preference․ A 12-cup coffeemaker, for example, typically requires 12 tablespoons (or ¾ cup) of grounds for a full pot․
Experiment to find your ideal strength! Using too little coffee will result in a weak brew, while too much can lead to a bitter taste․
Ensure the grounds are evenly distributed within the filter basket for consistent extraction․ Freshly ground beans are always recommended for the best possible flavor experience․
Setting the Clock & Timer
Accurate timekeeping is crucial for utilizing the programmable features of your Mr․ Coffee coffeemaker․ Begin by pressing the “Clock” or “Time Set” button – the specific label varies by model․
The display will likely flash, prompting you to enter the current hour․ Use the “Hour” and “Minute” buttons to adjust the time accordingly․ Confirm your settings by pressing the “Clock” or “Time Set” button again․
To set the timer for auto-brew, press the “Program” or “Auto” button․ Follow the prompts to set the desired brew start time, again using the “Hour” and “Minute” buttons․
Ensure the timer is enabled for automatic brewing to occur․
Brewing a Single Cup
Enjoying a smaller serving is simple with your Mr․ Coffee coffeemaker! While designed for full pots, brewing a single cup requires adjustments․ First, fill the water reservoir with the desired amount of water – typically 6-8 ounces․
Place a single-serve filter (if compatible with your model) into the filter basket․ Add one to two tablespoons of ground coffee, adjusting to your preferred strength․
Ensure the carafe is properly positioned on the warming plate․ Press the “Brew” button to initiate the brewing cycle․
Be mindful that brewing a smaller amount may result in a slightly different brew time and strength compared to a full pot․
Brewing a Full Pot
Brewing a full pot of coffee is straightforward with your Mr․ Coffee coffeemaker․ Begin by filling the water reservoir to the appropriate level, indicated by the water level markings – typically 12 cups․
Insert a paper filter or your reusable filter into the filter basket․ Add the recommended amount of ground coffee, generally two tablespoons per cup, adjusting to your taste․
Ensure the carafe is securely placed on the warming plate․ Press the “Brew” button to start the brewing process․
The coffeemaker will automatically shut off once brewing is complete, keeping your coffee warm on the warming plate․ Enjoy!
Advanced Features & Functions
Explore programmable auto-brew, the convenient pause & serve feature, brew strength options, and the fresh brew timer for optimal Mr․ Coffee enjoyment!
Programmable Brewing – Setting Auto-Brew
Wake up to freshly brewed coffee with the programmable features of your Mr․ Coffee maker! To set the auto-brew function, first ensure the clock is accurately set․ Then, press the “Program” button․ The display will likely prompt you to set the brew time – use the “Hour” and “Minute” buttons to input your desired start time․
Next, confirm your selection․ Ensure coffee grounds and water are in the machine before programming․ The Mr․ Coffee will automatically begin brewing at the programmed time․ This feature allows for convenient, pre-set coffee preparation, saving you time in the mornings․ Remember to check the manual for specific button labels, as they may vary slightly by model․
Enjoy the convenience of a hot, ready-to-drink pot of coffee, precisely when you want it!
Pause & Serve Feature – How it Works
Need a cup before the brewing cycle is complete? The Pause & Serve feature allows you to briefly interrupt the brewing process and pour yourself a cup without making a mess! Simply remove the carafe from the warming plate․ The brewing process will automatically pause, preventing coffee from dripping onto the hot plate․
Carefully pour your desired amount of coffee․ Then, return the carafe to the warming plate within 20 seconds to resume brewing․ Important: Leaving the carafe off for longer than this may affect brew quality․ This convenient feature provides flexibility, letting you enjoy a cup mid-brew without waiting for the entire pot to finish․ Refer to your specific model’s manual for any variations in operation․
Brew Strength Control (If Applicable)
Does your Mr․ Coffee model offer brew strength control? Some models feature a “Bold” or “Strong” setting, allowing you to customize the coffee’s intensity․ This function typically adjusts the brewing time, slowing down the water flow through the coffee grounds․ A slower flow extracts more flavor and oils, resulting in a richer, bolder cup of coffee․
To activate this feature, locate the “Brew Strength” button on your coffeemaker․ Pressing it will cycle through available options – Regular, Bold, or Strong․ Note: Not all Mr․ Coffee models include this functionality․ Consult your specific model’s instruction manual to confirm if brew strength control is available and how to operate it correctly for optimal results․
Fresh Brew Timer – Monitoring Coffee Freshness
Keep track of your coffee’s peak flavor! Many Mr․ Coffee coffeemakers include a “Fresh Brew Timer” displayed on the clock․ This timer automatically starts when brewing finishes, indicating how long your coffee has been sitting on the warming plate․
The timer helps you enjoy coffee at its freshest – generally within an hour or two for optimal taste․ After this time, flavor begins to degrade․ Tip: Refer to the timer to determine if it’s time for a fresh brew․ The warming plate maintains temperature, but doesn’t restore lost flavor․ Enjoy your coffee while it’s at its best!
Cleaning & Maintenance
Regular cleaning ensures optimal performance! This section covers daily tasks like carafe washing, descaling to remove mineral buildup, and exterior cleaning for longevity․
Daily Cleaning of Carafe, Filter Basket & Plate
Maintaining cleanliness after each brew is crucial․ After brewing, always unplug the coffeemaker and allow it to cool completely․ The glass carafe should be washed with warm, soapy water and a non-abrasive sponge․ Avoid harsh scouring pads that could scratch the glass․
The filter basket, whether using paper filters or a reusable one, should also be rinsed thoroughly with warm water․ Remove any coffee grounds and ensure no residue remains․ The brew plate, which warms the carafe, can be wiped down with a damp cloth to remove any coffee splatters or spills․
Dishwasher Safety: Check your model’s manual, as some carafes and filter baskets are dishwasher safe (top rack recommended)․ Regular daily cleaning prevents buildup and ensures fresh-tasting coffee with every brew!
Descaling Your Mr․ Coffee Maker – Why & How
Descaling removes mineral buildup from hard water, which can affect brewing performance and coffee taste․ Over time, these deposits accumulate, slowing down the brewing process and potentially damaging the machine․ Why descaling is important: It ensures optimal performance and extends the life of your Mr․ Coffee coffeemaker․
How to descale: Fill the water reservoir with a mixture of equal parts white vinegar and water․ Brew a full pot, then discard the liquid․ Repeat this process with fresh water two to three times to rinse away any remaining vinegar taste and odor․
Frequency: Descale every 3-6 months, depending on water hardness․
Cleaning the Exterior
Maintaining a clean exterior not only enhances the appearance of your Mr․ Coffee maker but also prevents the buildup of grime and spills․ Regularly wiping down the exterior surfaces contributes to a hygienic kitchen environment and prolongs the appliance’s lifespan․
How to clean: Unplug the coffeemaker and allow it to cool completely․ Use a damp, soft cloth to wipe down the exterior housing․ For stubborn stains, a mild dish soap solution can be used, but ensure it’s thoroughly rinsed off with a clean, damp cloth․
Avoid abrasive cleaners or scouring pads, as they can scratch the surface․ Pay attention to areas prone to spills, like around the carafe plate and control panel․
Troubleshooting Common Issues
Coffee maker not brewing? First, ensure it’s properly plugged in and the power outlet is functioning․ Check if the water reservoir is filled to the appropriate level and the carafe is correctly positioned on the warming plate․
Coffee tastes weak? Increase the amount of coffee grounds used, or select a “strong” brew setting if your model has one․ Coffee maker leaking? Verify the filter basket is correctly inserted and the carafe is properly aligned․
Error messages? Consult your specific model’s manual for error code definitions․ If issues persist, visit the Mr․ Coffee website for further assistance or PDF troubleshooting guides․

Safety Information & Warnings
Caution! Always follow electrical safety guidelines, avoid hot surfaces during and after brewing, and use the coffeemaker as intended to prevent damage․
Electrical Safety Guidelines
Important Safety Instructions: To reduce the risk of electrical shock, do not immerse the coffeemaker, cord, or plug in water or other liquids․ Never operate the appliance with a damaged cord or plug, or after the appliance malfunctions․
Always unplug the coffeemaker from the electrical outlet before cleaning, and before putting on or taking off parts․ Avoid using extension cords; if necessary, use a heavy-duty cord suitable for the appliance’s wattage․ Ensure the voltage of your outlet matches the appliance’s rating․
Do not attempt to repair the coffeemaker yourself; contact qualified service personnel for any repairs․ Keep the appliance and its cord away from heat sources and sharp edges․ Always handle the plug with dry hands․
Hot Surface Warnings
Caution: During and immediately after brewing, several surfaces of your Mr․ Coffee coffeemaker become extremely hot․ These include the warming plate, the carafe, and potentially the exterior housing․ Avoid touching these areas to prevent burns․
Use caution when handling the carafe, even with the handle, as residual heat can remain․ Always allow the coffeemaker to cool completely before cleaning or disassembling․ Keep children and pets away from the appliance during operation and cooling․
Be mindful of steam escaping from the brewing process; avoid placing your hands or face directly above the coffeemaker․ Never touch the brew basket while brewing․ Exercise extreme care when operating the Pause & Serve feature, as hot coffee may drip․
Proper Usage & Avoiding Damage
To ensure longevity, use your Mr․ Coffee coffeemaker as intended․ Only use it for brewing coffee; avoid heating other liquids․ Regularly descale the unit to prevent mineral buildup, which can impair performance and cause damage․ Always unplug the coffeemaker before cleaning․
Do not immerse the appliance in water or any other liquid․ Use only the recommended carafe; substituting with another may cause breakage and potential injury․ Avoid operating the coffeemaker without water in the reservoir․ Ensure the power cord is not damaged and doesn’t contact hot surfaces․
Never force parts together․ Proper care and adherence to these guidelines will maximize your coffeemaker’s lifespan and brewing enjoyment․

Finding Your Specific Manual (PDF Download)
Locate your manual easily on the Mr․ Coffee official website using your model number! Troubleshooting PDF opening issues? Check browser compatibility and download options․
Mr․ Coffee Official Website – Manual Lookup
Accessing your Mr․ Coffee maker’s instruction manual is straightforward through the official Mr․ Coffee website․ Navigate to their support or customer service section – often found at the bottom of the homepage․
There, you’ll typically find a dedicated “Instruction Manuals” or “Manual Lookup” area․ You can browse by product category or, more efficiently, enter your specific model number into a search bar․ This ensures you receive the correct documentation for your coffeemaker․
The website provides manuals in PDF format for easy downloading and viewing․ Mr․ Coffee offers a wide range of manuals, covering various models and series․ If you encounter difficulties, utilize the website’s help resources or contact their customer support team for assistance in locating your manual․

Identifying Your Model Number
Locating your Mr․ Coffee maker’s model number is crucial for accessing the correct instruction manual and support resources․ The model number is a unique identifier for your specific coffeemaker version․
Typically, you’ll find this number on a sticker or plate affixed to the bottom or back of the appliance․ Look for a label that includes the “Model No․” or simply “Model” followed by a series of letters and numbers (e․g;, PC12, BVMC-SJX33GT)․
Sometimes, the model number is also printed on the original packaging or your purchase receipt․ Having this number readily available will streamline the manual lookup process on the Mr․ Coffee website, ensuring you download the appropriate documentation for your machine․
Troubleshooting PDF Opening Issues
Experiencing difficulties opening your Mr․ Coffee instruction manual PDF? Several factors can cause this․ First, ensure you have a current PDF reader installed, such as Adobe Acrobat Reader, which is available as a free download․
If the PDF still won’t open, try right-clicking the link and selecting “Save Link As…” to download the file to your computer before attempting to open it․ A corrupted download can also be the issue; try downloading the PDF again․
Check your browser settings to ensure PDFs aren’t blocked․ Finally, if problems persist, consider temporarily disabling browser extensions or trying a different browser altogether․