
Heat N Glo Gas Fireplace Manual: A Comprehensive Guide
Heat & Glo fireplaces offer cozy warmth, but occasional troubleshooting is inevitable. This guide assists with common problems, from pilot lights to remote controls, ensuring safe operation.
Understanding Your Heat N Glo Fireplace
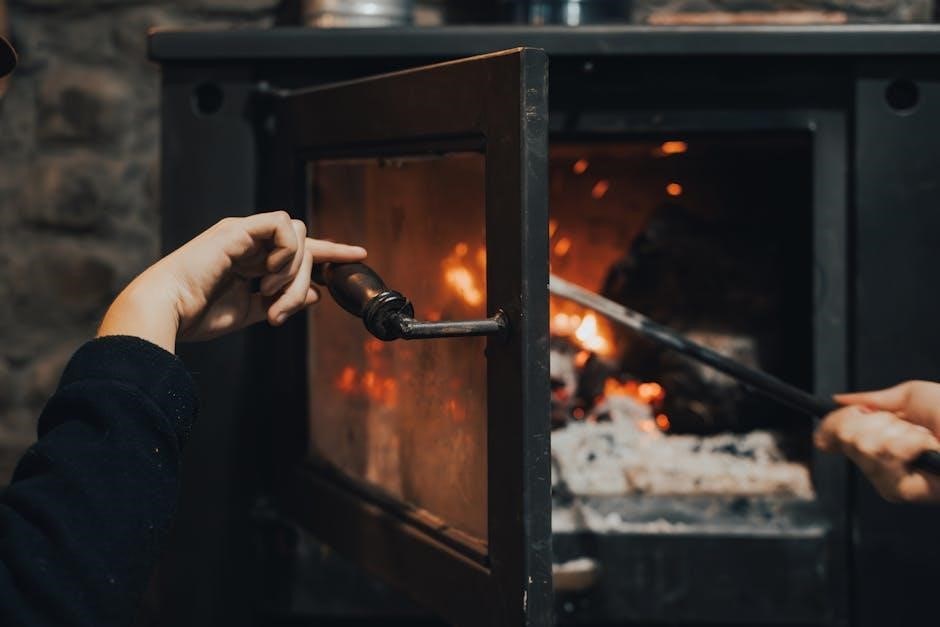
Heat N Glo gas fireplaces are engineered for both beauty and efficient heating, but understanding their core components is crucial for safe and effective use. These fireplaces utilize a gas valve to regulate fuel flow, an ignition system – often employing a pilot light or electronic igniter – to initiate combustion, and a flame sensor for safety.
The flame sensor detects the presence of a flame, and if it doesn’t, the gas supply is automatically shut off. Proper log placement is also vital, ensuring adequate airflow for complete combustion. Regular maintenance, including cleaning and professional inspections, extends the fireplace’s lifespan and maintains optimal performance. Familiarizing yourself with these elements empowers you to address minor issues and recognize when professional assistance is needed.
Locating Your Fireplace Model Number
Finding your Heat N Glo fireplace’s model number is essential for accessing the correct manual and obtaining specific parts or support. The model number is typically located on a silver label affixed to the fireplace itself. Common locations include inside the firebox, behind the glass front, or on the side of the unit.
Sometimes, the label is found on the gas valve or within the control compartment. Carefully inspect these areas. The model number is a combination of letters and numbers, uniquely identifying your fireplace. Having this information readily available streamlines troubleshooting, ordering replacement parts, and contacting customer service for assistance. Keep it noted for future reference!
Accessing Official Heat N Glo Manuals Online
Heat N Glo provides a comprehensive library of manuals directly on their official website. To locate your specific manual, you’ll need your fireplace’s model number – previously identified for easy access. Navigate to the Heat N Glo support section and utilize the search function, entering your model number for precise results.
Alternatively, many manuals are categorized by fireplace type (gas, electric, etc.). Downloadable PDFs are readily available, offering detailed instructions on operation, maintenance, and safety precautions. Ensure you download the manual corresponding to your exact model for accurate information. Keeping a digital copy is convenient for quick reference and troubleshooting assistance.

Troubleshooting Common Issues
Gas fireplace issues range from pilot light failures to ignition problems and gas valve malfunctions; diligent diagnosis and repair are crucial for safe operation.
Pilot Light Problems: Diagnosis and Solutions
A consistently failing pilot light is a frequent issue with Heat & Glo fireplaces. First, ensure the gas supply is fully open. If the pilot won’t stay lit, a dirty or faulty thermopile is often the culprit – this component generates the electricity needed to keep the gas valve open.
Testing the thermopile with a multimeter can confirm its functionality. A yellow or flickering pilot light suggests insufficient air for proper combustion. Check for obstructions in the air intake vents and burner ports. Carefully clean these areas to restore a stable, blue flame. If problems persist, a professional inspection is recommended to rule out gas valve issues or other underlying concerns.
Pilot Light Won’t Stay Lit
When your Heat & Glo pilot light refuses to remain lit, the most common cause is a failing thermopile. This vital component generates a small electrical current when heated by the pilot flame, keeping the gas valve open. A weak or defective thermopile simply can’t maintain the necessary voltage.
Before replacing the thermopile, verify the gas supply is adequate and the connection to the gas valve is secure. A multimeter test can confirm if the thermopile is producing sufficient millivolts. If the thermopile tests bad, replacement is necessary. Always follow manufacturer instructions and safety precautions when working with gas appliances, and consider professional assistance if you’re uncomfortable with the process.
Pilot Light is Yellow or Flickering
A yellow or flickering pilot light on your Heat & Glo fireplace indicates incomplete combustion, often due to insufficient air supply. This can produce carbon monoxide, a dangerous, odorless gas. Immediately address this issue. Check the air intake vents around the fireplace for obstructions like dust or debris, ensuring proper airflow.
Also, verify the log placement isn’t blocking the air inlets. Improper log positioning disrupts the flame pattern. A dirty or partially clogged burner can also contribute to incomplete combustion. Cleaning the burner ports with a wire brush may resolve the issue. If the problem persists, consult a qualified technician to inspect the gas pressure and burner assembly.
Ignition System Failures
Heat & Glo fireplaces rely on a robust ignition system for reliable operation. Failures can stem from a faulty igniter, a weak thermopile, or issues within the control module. A clicking sound without ignition often points to a failing igniter, requiring replacement. The thermopile, generating power from the pilot flame, may need testing with a multimeter to confirm sufficient voltage output.
Insufficient voltage prevents the gas valve from opening. Regularly inspect wiring connections for corrosion or damage. If the system repeatedly fails to ignite, even with a functioning igniter and thermopile, a professional diagnosis of the control module is recommended. Ignoring ignition failures can lead to gas buildup and potential hazards.
Faulty Igniter Replacement
Replacing a faulty igniter in your Heat & Glo fireplace is a manageable DIY task, but safety is paramount – disconnect the gas supply first! Locate the igniter, typically near the pilot assembly. Carefully disconnect the wires connected to the old igniter, noting their positions for correct re-connection. Remove the mounting screw(s) securing the igniter.
Install the new igniter, ensuring it’s securely fastened and the wires are reconnected precisely as before. Double-check all connections. Restore the gas supply and test the ignition system. If it still fails, verify wire connections and consider a thermopile test. Always consult your fireplace’s specific manual for detailed instructions and part numbers.
Thermopile Issues and Testing
The thermopile generates the small electrical current needed to operate the gas valve. If it’s faulty, the pilot light may not stay lit. Testing requires a multimeter set to millivolts (mV). With the pilot light on, measure the mV output across the thermopile terminals – a reading below the manufacturer’s specification (typically 300-700mV) indicates a problem.
A weak thermopile often results from corrosion or a loose connection. Clean the connections thoroughly. If cleaning doesn’t resolve the issue, replacement is necessary. Ensure the new thermopile is compatible with your Heat & Glo model. Always disconnect the gas before working on the thermopile and consult your manual for specific testing procedures.
Gas Valve Problems
A malfunctioning gas valve can prevent your Heat & Glo fireplace from igniting or maintaining a flame. Symptoms include no gas flow to the pilot, inconsistent flame height, or the inability to control the flame. Identifying a bad gas valve often involves checking for a clicking sound when attempting ignition – silence suggests a valve issue.
Gas valve replacement requires extreme caution. First, shut off the gas supply! Disconnect the electrical connection and carefully remove the old valve, noting the gas line connections. Install the new valve, ensuring tight connections to prevent leaks. Always test for gas leaks with a soapy water solution after installation and before relighting the pilot.
Identifying a Bad Gas Valve
Determining if your Heat & Glo fireplace’s gas valve is faulty requires careful observation. A primary sign is a complete lack of gas flow to the pilot light, preventing ignition. Inconsistent flame height, fluctuating even with control adjustments, also points to a valve issue. Listen closely when initiating ignition; a clicking sound indicates the valve is receiving a signal, but silence suggests a problem.
Visually inspect the valve for corrosion or damage. A failing valve might struggle to maintain a consistent gas pressure. If you suspect a bad valve, do not attempt repairs yourself – gas leaks are dangerous. Consult a qualified technician for diagnosis and replacement.
Gas Valve Replacement Procedures
Gas valve replacement is best left to qualified professionals due to inherent safety risks. First, completely shut off the gas supply to the fireplace. Carefully disconnect the existing valve, noting the gas line connections and electrical wiring. Ensure the new valve is an exact match for the old one, verifying specifications.
Connect the gas line using approved pipe sealant, and reattach the electrical connections precisely. Before restoring gas, thoroughly check all connections for leaks using a soap solution – bubbles indicate a leak. Finally, relight the pilot and test the valve’s functionality. Never proceed if you smell gas or suspect a leak.
Safety Features and Maintenance
Heat & Glo fireplaces include flame sensors and high-limit switches for safety. Regular maintenance, including carbon monoxide detector checks, is crucial for reliable operation.
Understanding the Flame Sensor
The flame sensor is a critical safety component within your Heat & Glo gas fireplace. Its primary function is to verify the presence of a flame, ensuring that gas flow continues only when combustion is occurring. If the sensor doesn’t detect a flame, it signals the gas valve to shut off, preventing a potentially dangerous gas buildup.
Cycling issues, where the fireplace repeatedly turns on and off, are often linked to a faulty or dirty flame sensor. The sensor can become coated with soot or debris, hindering its ability to accurately detect the flame. This triggers the safety shutoff, causing the fireplace to cycle. Regular inspection and cleaning are vital for optimal performance and safety. A properly functioning flame sensor guarantees safe and efficient fireplace operation.
Cleaning the Flame Sensor
To clean the flame sensor, begin by carefully disconnecting the gas supply to your Heat & Glo fireplace – safety first! Locate the flame sensor; it’s typically a single metal rod positioned near the burner. Gently remove the sensor from its bracket. Using fine steel wool (grade 0000 is recommended), lightly rub the metal rod to remove any soot or corrosion.
Avoid using abrasive cleaners, as these can damage the sensor. Once cleaned, re-install the sensor securely into its bracket and reconnect the gas supply. After cleaning, test the fireplace to ensure proper operation. A clean flame sensor will reliably detect the flame, preventing unwanted cycling and ensuring safe, efficient heating. Regular cleaning, ideally during annual maintenance, is crucial.
High-Limit Switch Functionality
The high-limit switch is a vital safety component within your Heat & Glo gas fireplace. Its primary function is to prevent overheating by automatically shutting off the gas supply if the fireplace reaches an unsafe temperature. This switch monitors the temperature within the firebox and activates when a pre-set limit is exceeded, protecting both the unit and your home.

A malfunctioning high-limit switch can prevent the fireplace from operating at all. Testing requires a multimeter and understanding of your specific model’s wiring diagram. Never attempt to bypass or disable this safety feature. If you suspect a faulty high-limit switch, professional inspection and replacement are strongly recommended to ensure continued safe operation.
Carbon Monoxide Detector Importance
Heat & Glo gas fireplaces, while providing warmth and ambiance, produce carbon monoxide (CO) as a byproduct of combustion. CO is a colorless, odorless, and potentially deadly gas, making it undetectable without specialized equipment. Therefore, a working carbon monoxide detector is absolutely crucial for safety when operating a gas fireplace.

Install CO detectors on every level of your home, especially near sleeping areas. Regularly test the detectors to ensure they are functioning correctly, and replace batteries as needed. Never ignore a CO alarm – evacuate the premises immediately and call emergency services. Proper fireplace maintenance and ventilation also minimize CO risks, but a detector remains your primary line of defense.
Remote Control Operation
Heat & Glo remote controls offer convenient fireplace management. Pairing, battery replacement, and troubleshooting steps are essential for optimal functionality and user experience.
Remote Control Pairing Instructions
Successfully pairing your Heat & Glo remote control to your fireplace receiver is crucial for seamless operation. Begin by ensuring the fireplace is powered on. Locate the “Learn” or “Pair” button on your receiver – consult your specific model’s manual for its exact location, as it varies.
Press and hold this button until the receiver enters pairing mode, usually indicated by a flashing light. Next, on your remote, simultaneously press and hold the “Mode” and “Heat” buttons for several seconds. The remote should transmit a signal, and the receiver’s light will confirm successful pairing.
If pairing fails, repeat the process, ensuring no other infrared devices interfere. Some models require a specific sequence of button presses; always refer to your fireplace’s documentation for precise instructions. A properly paired remote will allow you to control flame height, heat output, and other features effortlessly.
Remote Control Battery Replacement
Maintaining your Heat & Glo remote control requires periodic battery replacement to ensure reliable operation. Typically, these remotes utilize AA or AAA batteries, though your specific model’s manual will confirm the correct type. Begin by carefully removing the battery compartment cover, usually located on the back of the remote.
Note the battery orientation before removal to ensure correct reinstallation. Replace all batteries simultaneously with fresh ones, even if only some appear depleted. Avoid mixing old and new batteries, or different battery types.
Securely replace the battery compartment cover. After replacement, test the remote’s functionality by attempting to control your fireplace. If the remote still doesn’t work, double-check the battery polarity and consider re-pairing the remote with the receiver, following the pairing instructions.
Troubleshooting Remote Control Issues
If your Heat & Glo remote isn’t responding, several factors could be at play. First, verify fresh batteries are correctly installed, observing proper polarity. Next, ensure a clear line of sight between the remote and the fireplace’s receiver; obstructions can interfere with the signal.
If the issue persists, attempt to re-pair the remote with the fireplace receiver – consult your model’s manual for specific pairing procedures. Sometimes, interference from other electronic devices can cause problems; try moving potential sources of interference away from the fireplace.
A faulty remote or receiver could also be the cause. Test with a universal remote if possible. If none of these steps resolve the issue, professional service may be required.
Advanced Troubleshooting
Complex issues like cycling flames, gas pressure regulation, and improper log placement require careful diagnosis and may necessitate a qualified technician’s expertise.
Cycling Issues: The Flame Sensor Connection
Frequent on-off cycling of your Heat N Glo fireplace often points to a problematic flame sensor. This crucial component verifies the presence of a flame, and if it fails to detect it consistently, the gas valve shuts off as a safety precaution, causing the cycling. A dirty or faulty flame sensor is a common culprit.
The sensor accumulates soot and debris over time, hindering its ability to accurately sense the flame. Cleaning the flame sensor with fine steel wool can often resolve this issue. However, if cleaning doesn’t help, the sensor itself may be defective and require replacement. A weak connection to the flame sensor can also cause intermittent cycling, so ensure all wiring is secure.
Gas Pressure Regulation Problems
Consistent and correct gas pressure is vital for optimal Heat N Glo fireplace performance. Issues with gas pressure regulation can manifest as a weak flame, uneven heating, or even a complete failure to ignite. The gas pressure regulator controls the flow of gas to the fireplace, and if it malfunctions, it can deliver too much or too little gas.
Low gas pressure might stem from a partially blocked gas line or a failing regulator. Conversely, excessively high pressure is dangerous and requires immediate attention. Never attempt to adjust the regulator yourself; this should only be done by a qualified gas technician. They will use a manometer to accurately measure and adjust the gas pressure to the manufacturer’s specifications, ensuring safe and efficient operation.
Log Placement and Airflow
Proper log placement is crucial for achieving a realistic flame pattern and efficient heat distribution in your Heat N Glo gas fireplace. The manual details the specific arrangement for your model, ensuring correct airflow around the logs. Incorrect placement can lead to sooting, incomplete combustion, and reduced heating performance.
Airflow is equally important. Blocked vents or obstructed air passages can disrupt the flame and create carbon monoxide. Regularly inspect the log area for debris and ensure all air vents are clear. Avoid rearranging the logs unless specifically instructed by the manual, as this can compromise safety and efficiency. Maintaining proper log placement and airflow guarantees a beautiful and safe fire.
Maintenance Schedule
Regular upkeep, including annual professional inspections and DIY cleaning, extends your Heat N Glo fireplace’s lifespan and ensures optimal, safe performance consistently.
Annual Professional Inspection
Scheduling a yearly inspection by a qualified technician is paramount for maintaining your Heat N Glo gas fireplace’s safety and efficiency. A professional will meticulously examine the gas line connections, ensuring there are no leaks and verifying proper gas pressure regulation. They’ll also inspect the venting system for obstructions or corrosion, crucial for preventing carbon monoxide buildup.
The technician will assess the burner assembly, pilot light, and ignition system, identifying any worn or damaged components needing replacement. Furthermore, they’ll check the operation of safety features like the flame sensor and high-limit switch. A comprehensive inspection provides peace of mind, guaranteeing your fireplace operates reliably and safely throughout the heating season. Don’t neglect this vital preventative measure!

DIY Cleaning Procedures
Regular cleaning extends your Heat N Glo gas fireplace’s lifespan and maintains optimal performance. Before starting, always ensure the gas supply is completely shut off. Begin by carefully removing the glass front and cleaning it with a specialized glass cleaner – avoid abrasive products. Vacuum the fireplace interior, removing dust, debris, and any loose material.
Pay close attention to the burner area, gently brushing away any obstructions. The flame sensor benefits from a light cleaning with fine steel wool to ensure proper flame detection. Inspect the ceramic logs, removing dust and repositioning them according to the manual’s diagram. Remember proper airflow is vital. Reassemble carefully, and enjoy a clean, efficient fireplace!
Component Lubrication
While Heat N Glo fireplaces require minimal lubrication, certain components benefit from periodic attention. The gas valve handle, if manually operated, can become stiff over time; apply a small amount of silicone-based lubricant to ensure smooth operation. Similarly, the pilot assembly’s moving parts may require a tiny drop of lubricant, but avoid over-lubrication, as this can attract dust and debris.
Check the operation of any access doors or panels, lubricating hinges with a silicone spray if needed. Never use oil-based lubricants, as they can degrade rubber seals. Always consult your specific model’s manual for recommended lubrication points and types. Proper lubrication contributes to quiet operation and extends component life.