Nikon D5100 Owners Manual: A Comprehensive Guide
Welcome! This manual provides detailed instructions for maximizing your Nikon D5100’s potential, ensuring beautiful photos and enjoyable experiences.

Congratulations on acquiring the Nikon D5100, a powerful and versatile Digital Single-Lens Reflex (DSLR) camera designed for both beginners and enthusiasts. This camera offers a fantastic entry point into the world of professional-quality photography, boasting a 16.2-megapixel DX-format CMOS sensor and Full HD 1080p video recording capabilities.
The D5100’s user-friendly interface and helpful Guide Mode make learning the fundamentals of photography straightforward. Whether you’re capturing stunning landscapes, vibrant portraits, or fast-action sports, this camera delivers exceptional image quality and creative control. This manual will serve as your companion, guiding you through every feature and function, helping you unlock the full potential of your new Nikon D5100 and elevate your photographic journey.
What’s in the Box? ౼ Unpacking Your Camera
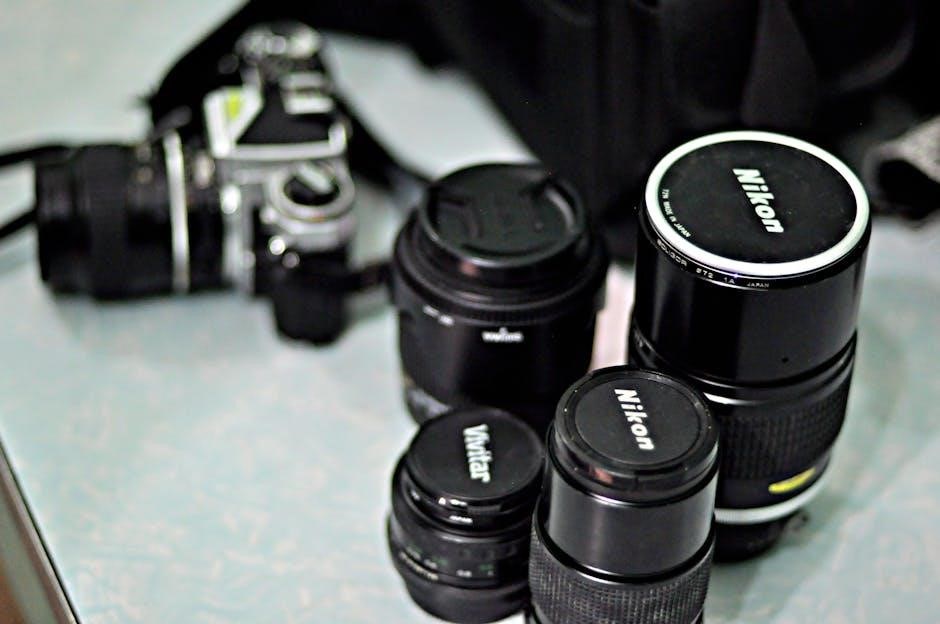
Carefully unpack your Nikon D5100 and verify that all included components are present. You should find the D5100 camera body itself, a Nikkor 18-55mm VR kit lens, a battery and battery charger, a USB cable for data transfer, and a video cable for connecting to a TV or monitor.
Also included are a strap for comfortable carrying, a body cap to protect the sensor when a lens isn’t attached, a lens cap for the 18-55mm lens, and a CD-ROM containing the Nikon ViewNX 2 software and this comprehensive owner’s manual. Finally, you’ll find warranty information and important documentation. Inspect all items for any signs of damage during shipping. Contact your retailer immediately if anything is missing or damaged.
Camera Overview ౼ Key Components & Controls
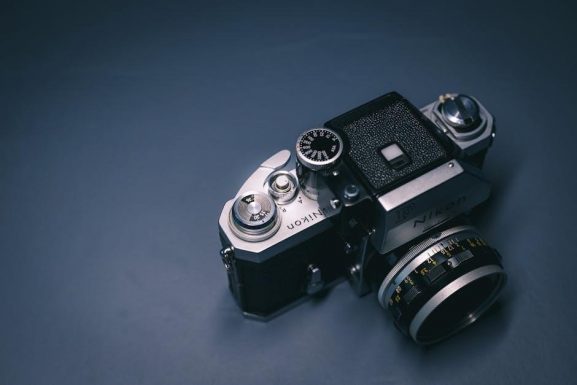
Familiarizing yourself with the Nikon D5100’s layout is crucial for efficient operation. The camera features a large 3.0-inch LCD screen for composing shots and reviewing images. Above the screen is the optical viewfinder, providing a clear view of your subject. The mode dial on top allows quick selection of shooting modes – Auto, Program, Aperture Priority, Shutter Priority, and Manual.
Essential controls include the shutter button, main command dial for adjusting settings, and a multi-selector for navigating menus. The front and rear command dials offer further control over exposure. Locate the lens release button, the built-in flash, and the microphone. Understanding these key components will significantly enhance your photography experience.
3.1 Front Panel Features
The Nikon D5100’s front panel houses several important elements. Primarily, you’ll find the lens mount, compatible with Nikon F-mount lenses. The lens release button allows for quick lens changes. To the side is the depth-of-field preview button, enabling you to visualize the effect of aperture on your image.
Also present are the autofocus-assist illuminator and the flash sync terminal. The self-timer lamp indicates when the self-timer is active. The function button can be customized to access frequently used settings. Finally, the microphone is positioned for optimal audio recording during video capture. Familiarity with these features streamlines your shooting process.
3.2 Rear Panel Features
The rear panel of the Nikon D5100 is dominated by the large 3.0-inch LCD screen, used for live view shooting, image playback, and menu navigation. To the right of the screen are buttons for playback and menu access. The directional pad facilitates menu selection and image browsing.
Above the LCD, you’ll find the diopter adjustment dial, crucial for correcting vision without glasses. The viewfinder eyepiece sits alongside. The ‘i’ button provides quick access to frequently used settings. The video record button initiates video capture. Lastly, the speaker delivers audio playback. Understanding these controls enhances your overall shooting experience.
3.3 Top Panel Features
The Nikon D5100’s top panel houses essential controls for immediate adjustments. Centrally located is the mode dial, allowing quick selection of Auto, Scene, P, S, A, and M modes. To the right, the main command dial adjusts settings like aperture and shutter speed, depending on the selected mode.
The shutter release button, paired with the on/off switch, initiates both still images and video recording. Nearby, the front and rear dial lock prevents accidental changes. The pop-up flash button activates the built-in flash. Finally, the microphone is positioned for optimal audio capture during video recording. Familiarizing yourself with these features streamlines your workflow.
Getting Started ౼ Initial Setup
Before capturing your first image, proper initial setup is crucial. First, insert a compatible SD card into the card slot. Next, attach the supplied battery and charge it fully using the provided charger. Power on the camera and follow the on-screen prompts to set the language, date, and time.
Then, select your preferred image quality and size settings. Consider choosing RAW + JPEG for maximum editing flexibility. Finally, adjust the viewfinder diopter to match your vision for a clear view. These initial steps ensure optimal performance and a personalized shooting experience from the start.
Understanding Shooting Modes
The Nikon D5100 offers a versatile range of shooting modes to suit various skill levels and photographic situations. These modes control how much creative input you have over the final image. Auto modes, like Auto and Scene, simplify operation for beginners, automatically selecting settings based on the detected scene.
Semi-automatic modes, such as Aperture Priority and Shutter Priority, grant control over specific settings while the camera adjusts others. Finally, Manual mode (M) provides complete control over aperture, shutter speed, and ISO, allowing for full creative expression. Experimenting with each mode is key to mastering your camera;
5.1 Auto Modes (Auto, Scene)
Auto mode is the simplest way to capture photos with your Nikon D5100. The camera analyzes the scene and automatically selects the optimal settings for exposure, focus, and white balance. It’s perfect for quick snapshots and everyday photography when you don’t have time to adjust settings.
Scene mode offers pre-defined settings tailored to specific shooting scenarios like Portrait, Landscape, Sports, and Night Portrait. Selecting the appropriate scene mode optimizes the camera for that particular subject, improving image quality. These modes are ideal for beginners learning about different photographic techniques.
5.2 Semi-Automatic Modes (Aperture Priority, Shutter Priority)
Aperture Priority (A or Av) mode allows you to control the lens aperture, influencing depth of field – the area in focus. A wider aperture (lower f-number) creates a shallow depth of field, ideal for portraits, while a narrower aperture (higher f-number) maximizes depth of field for landscapes. The camera automatically sets the shutter speed.
Shutter Priority (S or Tv) mode lets you control the shutter speed, determining how motion is captured. Fast shutter speeds freeze action, while slow shutter speeds blur motion. The camera automatically adjusts the aperture. These modes offer creative control while simplifying exposure settings.
5.3 Manual Mode (M) ౼ Full Control
Manual Mode (M) grants complete control over both aperture and shutter speed, offering ultimate creative flexibility. This mode requires a solid understanding of the exposure triangle – the relationship between aperture, shutter speed, and ISO. Use the camera’s light meter as a guide to achieve proper exposure.
In Manual mode, you independently set the aperture for depth of field and the shutter speed for motion control. Adjust ISO to fine-tune sensitivity in varying lighting conditions. While demanding, Manual mode unlocks your photographic vision, allowing precise adjustments for unique effects and challenging scenes. Practice is key to mastering this powerful mode!
Focusing & Autofocus Settings
Achieving sharp images relies on mastering the D5100’s focusing system; The autofocus (AF) system utilizes various area modes to pinpoint subject clarity; Understanding these modes is crucial for different shooting scenarios.
The D5100 offers Single-point AF, ideal for stationary subjects, Dynamic-area AF, which tracks moving subjects, and Auto-area AF, letting the camera choose the focus point. Explore Focus Lock, allowing you to lock focus on a subject and recompose the shot. Experiment with these settings to optimize focus accuracy and capture consistently sharp photographs, adapting to diverse photographic opportunities.
6.1 Autofocus Area Modes (Single, Dynamic, Auto)
The Nikon D5100 provides three primary Autofocus Area Modes. Single-point AF lets you select a specific focus point, perfect for static subjects demanding precise focus. Dynamic-area AF utilizes nine focus points, tracking moving subjects as they traverse the frame – ideal for sports or wildlife.
Auto-area AF allows the camera to automatically select the focus point, simplifying operation for general photography. Choosing the correct mode depends on your subject and shooting conditions. Experiment with each to understand their strengths and weaknesses, ultimately enhancing your image sharpness and overall photographic control.
6.2 Focus Lock & Recomposition
Focus Lock & Recomposition is a valuable technique for creatively framing your shots. First, center the focus point on your subject and achieve sharp focus. Then, while holding the shutter button halfway down to maintain focus lock, recompose the image to your desired framing.
This method is particularly useful when your desired composition doesn’t align with an autofocus point. Be mindful of depth of field; a wider aperture may require careful recomposition to avoid losing focus. Practice this technique to add artistic flair and precision to your photography, ensuring your subject remains sharp within the final frame.
Exposure Control ౼ Aperture, Shutter Speed & ISO
Mastering exposure is fundamental to photography. Exposure is controlled by three key settings: aperture, shutter speed, and ISO. Aperture (f-stop) controls the lens opening, affecting depth of field – how much of the image is in focus. A lower f-number (e.g., f/2.8) creates a shallow depth of field, ideal for portraits.
Shutter speed determines how long the sensor is exposed to light, influencing motion blur. Faster speeds freeze action, while slower speeds allow for motion blur. ISO measures the sensor’s sensitivity to light; higher ISOs are useful in low light but can introduce noise. Balancing these three elements creates a properly exposed image.
Understanding White Balance
White balance (WB) ensures colors are accurately rendered in your photos. Different light sources emit varying color temperatures, impacting how colors appear. Incorrect WB can result in color casts – images appearing too warm (yellowish) or too cool (bluish).
The Nikon D5100 offers several WB presets, including Auto, Daylight, Cloudy, Fluorescent, and Incandescent. Auto WB generally performs well, but for critical shots, selecting the appropriate preset yields better results. You can also use Custom WB to manually set the color temperature using a white or gray card. Experimenting with WB creatively can also produce unique artistic effects.
Image Quality Settings ౼ RAW vs. JPEG
Choosing between RAW and JPEG significantly impacts image editing flexibility. JPEG files are compressed, resulting in smaller file sizes but losing some image data. They are ready to share directly from the camera. RAW files, however, contain all image data captured by the sensor, offering maximum editing control in post-processing software like Adobe Lightroom or Nikon Capture NX-D.
While RAW files are larger, they allow for adjustments to exposure, white balance, and color without significant quality loss. If you plan extensive editing, shoot in RAW. For quick snapshots and immediate sharing, JPEG is sufficient.
Using the Built-in Flash
The Nikon D5100’s built-in flash is a versatile tool for improving image brightness in low-light situations. Press the flash icon to raise it; pressing again cycles through modes. Auto mode lets the camera decide when to fire the flash. Fill-flash forces the flash to fire, balancing exposure with bright backgrounds. Red-eye reduction emits a pre-flash to constrict pupils, minimizing red-eye effect.

Flash compensation allows fine-tuning flash intensity. Positive values increase brightness, while negative values decrease it. Experiment to achieve natural-looking results. Be mindful of reflections and harsh shadows when using the flash, and consider diffusing it for softer light.
10.1 Flash Modes (Auto, Fill-Flash, Red-Eye Reduction)
Auto flash mode is your camera’s intelligent assistant, automatically determining when flash is needed based on ambient light levels. It’s ideal for general photography. Fill-flash mode provides a burst of light even in bright conditions, useful for eliminating shadows on subjects and creating balanced exposures.
Red-eye reduction mode tackles the common issue of red pupils in flash photos. It emits a series of pre-flashes to constrict the subject’s pupils before the main flash fires; While effective, it may cause slight delays. Remember to select the appropriate mode for optimal results in various shooting scenarios.
10.2 Flash Compensation
Flash compensation allows fine-tuning of the flash output, overriding the camera’s automatic settings. A positive value (+0.7, +1.0, etc.) increases flash power, brightening the image – useful when the subject is backlit or appears underexposed. Conversely, a negative value (-0.7, -1.0, etc.) reduces flash power, darkening the image – helpful when the subject is too bright or close to the camera.
Experimenting with flash compensation is key to achieving perfectly exposed photos in challenging lighting. Use it to balance the flash with the ambient light, creating natural-looking results. Remember to reset the compensation to 0 when not actively adjusting flash output.
Navigating the Menu System
The Nikon D5100’s menu is accessed via the MENU button on the rear panel. It’s logically organized into several tabs: Setup, Shooting, Custom Settings, Video, and Retouch. Use the directional pad to navigate between tabs and options. The OK button confirms selections, while the DISP button returns to the previous menu.
Familiarize yourself with the menu structure to quickly locate and adjust camera settings. The i button provides quick access to frequently used settings. Don’t hesitate to explore – the menu offers extensive customization options to tailor the camera to your shooting style.
Viewing & Deleting Images
To view your photos, press the playback button (the triangle pointing right). Use the directional pad to scroll through images. Zoom in using the zoom control to check focus and detail. Pressing the DISP button cycles through display options, including image information.
Deleting images is straightforward: select the image, press the MENU button, navigate to the delete option, and confirm. Be cautious – deleted images are often unrecoverable! You can delete single images, a selected range, or all images on the card. Always double-check before confirming deletion.
Connecting to a Computer & Transferring Photos
Connect your D5100 to your computer using the supplied USB cable. Power on the camera. Your computer should recognize it as a removable drive. Alternatively, install Nikon’s ViewNX-i software for enhanced transfer and organization.
To transfer photos, simply copy and paste them from the camera’s drive to your computer. ViewNX-i offers features like image editing and batch processing. Ensure the camera is fully charged or connected to a power source during transfer. Safely eject the camera from your computer before disconnecting the USB cable to prevent data corruption.
Basic Video Recording with the D5100
To start recording, rotate the mode dial to the movie camera icon. Press the record button to begin and stop recording. The D5100 records in Full HD (1080p) at various frame rates – choose your setting in the menu.
Focusing during video can be automatic or manual. Autofocus may hunt, so manual focus often yields better results. Ensure sufficient lighting for optimal video quality. The built-in microphone captures audio, but an external microphone improves sound significantly. Review your footage on the LCD screen immediately after recording.
Troubleshooting Common Issues
If your camera won’t turn on, check the battery charge and ensure it’s correctly inserted. Blurry images often indicate incorrect focus or a slow shutter speed; try autofocus or a faster setting. Error messages usually have solutions in the manual – consult the index!
Card errors may require reformatting (back up your photos first!). Dark images could mean incorrect exposure settings; adjust aperture, shutter speed, or ISO. If the lens won’t detach, ensure it’s not in shooting mode. Regularly check for firmware updates on Nikon’s website for bug fixes.
Cleaning & Maintenance
Regular cleaning extends your D5100’s lifespan. Use a soft, dry microfiber cloth to wipe the body and lens. Never use liquid cleaners directly on the camera; apply to the cloth first. Sensor dust can appear as spots in photos – use a blower to gently remove it (professional sensor cleaning is recommended for stubborn dust).
Store your camera in a dry, dust-free environment. Avoid extreme temperatures and humidity. Clean the viewfinder with a lens cloth. Periodically check and clean the battery contacts. Do not attempt to disassemble the camera yourself; this will void the warranty and could cause damage.
Customizing Your Camera Settings
Personalize your Nikon D5100 for optimal workflow! Access the setup menu to adjust settings like image quality, file naming, and date/time format. Customize button functions for quick access to frequently used features. Explore the ‘My Menu’ option to create a personalized menu with your preferred settings.
Adjust the auto ISO settings to control noise reduction and maximum ISO value. Configure the shooting menu to tailor autofocus, metering, and flash settings to your shooting style. Don’t forget to set up custom picture controls for unique image looks. Regularly review and refine these settings for a truly personalized experience.

Understanding the Nikon D5100’s Metering System
Mastering exposure requires understanding your D5100’s metering modes. The camera analyzes scene brightness to suggest optimal settings. Choose from Matrix, Center-weighted, and Spot metering. Matrix metering is versatile for general scenes, evaluating the entire frame. Center-weighted prioritizes the center of the image, ideal for portraits. Spot metering measures a very small area, useful for challenging lighting.
Utilize exposure compensation to fine-tune brightness. Monitor the exposure indicator in the viewfinder to ensure proper exposure. Experiment with different modes to see how they affect your images in various conditions. Understanding these modes empowers you to achieve consistently well-exposed photographs.
Exploring Creative Picture Control Options
Unleash your artistic vision with Nikon’s Picture Control system! These presets modify image characteristics like sharpness, contrast, brightness, and saturation. Select from Standard, Neutral, Vivid, Monochrome, Portrait, Landscape, and Flat. Standard offers balanced settings for everyday shooting. Vivid boosts colors for impactful images.
Portrait softens skin tones, while Landscape enhances blues and greens. Monochrome creates striking black and white photos. Customize each Picture Control to your preference! Adjust parameters individually for a unique look. Experimenting with these settings allows you to achieve the desired aesthetic directly in-camera, reducing post-processing time.
Resources & Further Learning
Expand your photographic knowledge beyond this manual! Nikon’s official website (https://nikonusa.com) offers extensive support, FAQs, and downloadable resources. Explore online photography communities and forums – engaging with fellow D5100 users can provide valuable tips and inspiration.
Consider online courses and tutorials covering photography basics and advanced techniques. Websites like Skillshare and Udemy offer comprehensive learning paths. Don’t forget YouTube – a treasure trove of free video tutorials. Practice consistently, experiment with different settings, and most importantly, have fun discovering your photographic style!