Spy Pen Video Camera Instructions: A Comprehensive Guide

Welcome! This guide details operation of your new spy pen camera. It covers everything from initial setup – charging and SD card insertion – to recording, file transfer, and troubleshooting.
Understanding the userconfig.txt file for customization is also included. This manual ensures optimal performance and addresses common issues, offering safety and legal considerations;
Understanding Your Spy Pen Camera
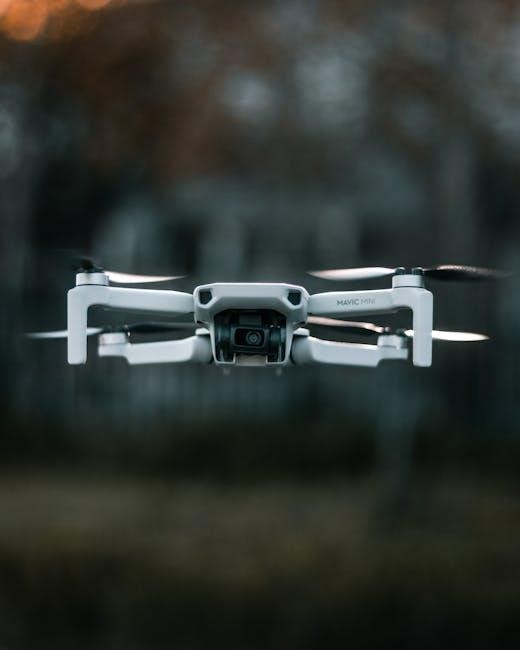
Your spy pen camera is a discreet recording device cleverly disguised as a functional writing instrument. It’s designed for covert video and audio capture, offering a portable and unassuming method for surveillance or documentation. Unlike traditional cameras, its primary function is concealment, allowing for recording in situations where a visible camera would be conspicuous or raise suspicion.
These devices typically feature a built-in lens, microphone, and internal storage – a Micro SD card slot – for recording media. Operation is usually simplified to a few button presses, enabling quick activation and deactivation. The pen itself functions as intended, maintaining the illusion of a normal writing tool.
Key features include video recording in various resolutions (often up to 1080p HD), still photograph capture, and the ability to connect to a computer via USB for file transfer. Some models offer time and date stamping, loop recording, and motion detection. Understanding these features and their limitations is crucial for effective use. Remember, the camera’s effectiveness relies on its inconspicuousness and ease of operation.
Always check local laws regarding recording.
Components Included
Your spy pen camera package should contain several essential components to ensure immediate usability. Primarily, you will receive the spy pen camera itself, meticulously designed to resemble a standard writing pen. This houses the camera lens, microphone, battery, and recording controls.
A USB cable is included, vital for charging the device and transferring recorded files to your computer. This cable typically connects to a standard USB port. Importantly, please note that a Micro SD memory card is not typically included and must be purchased separately. The camera requires a Micro SD card for storing video and photo recordings; capacity varies depending on your needs.
Some packages may also include a user manual, providing detailed instructions on operation, troubleshooting, and safety precautions. Occasionally, a small reset tool or adapter might be present, depending on the specific model. Verify all components are present upon opening the package. Retain the packaging for potential warranty claims or returns.
Ensure all items are accounted for before proceeding.
Initial Setup: Charging the Device
Before first use, it’s crucial to fully charge your spy pen camera. Connect the provided USB cable to the camera’s charging port – typically located near the pen’s clip or end. Then, plug the other end into a powered USB port on your computer or a USB wall adapter.
During charging, a red indicator light will usually illuminate, signifying that the battery is being replenished. This light may blink to indicate charging progress. Allow the camera to charge for approximately 2-3 hours for a full charge. The indicator light will typically change to green when charging is complete.
Avoid using the camera while it’s charging, as this can potentially damage the battery or internal components. A fully charged battery provides several hours of recording time, but this varies based on resolution and usage. It’s recommended to fully charge the device before each extended recording session. Disconnect the cable once charging is finished to preserve battery health.
Proper charging ensures optimal performance.
Inserting the Micro SD Card

Locate the Micro SD card slot on your spy pen camera. This is usually found by unscrewing a section of the pen casing, revealing a small slot. Important: The camera does not include a Micro SD card; it must be purchased separately. Ensure you are using a Micro SD card (not a standard SD card) and that it’s compatible with your camera’s maximum supported capacity – typically up to 32GB or 64GB.
Gently insert the Micro SD card into the slot, ensuring it’s oriented correctly. It will usually click into place. Do not force the card, as this could damage the card or the camera. Once inserted, carefully screw the pen casing back together, ensuring it’s securely fastened.
Before recording, it’s essential to format the Micro SD card (see the next section) to ensure compatibility and optimal performance. The camera may not recognize a previously used or improperly formatted card. Always eject the card safely from your computer before removing it from the camera.
Proper insertion is key for functionality.
Formatting the Micro SD Card
Formatting the Micro SD card is crucial for ensuring compatibility and optimal performance with your spy pen camera. Before first use, and periodically thereafter, format the card to eliminate potential errors. Connect the spy pen camera to your computer using the provided USB cable. Your computer should recognize the camera as a removable drive.
Navigate to the removable drive in your computer’s file explorer (Windows) or Finder (Mac). Right-click on the drive and select “Format.” Choose FAT32 as the file system – this is the standard format for most spy pen cameras. Ensure “Quick Format” is selected for a faster process.
Start the formatting process and wait for it to complete. Once finished, safely eject the Micro SD card from your computer. Re-insert the card into the spy pen camera. The card is now ready for recording. Caution: Formatting will erase all data on the card, so back up any important files before proceeding. Failure to format correctly may result in the camera not recognizing the card.
Powering On and Off
Powering on and off your spy pen camera is typically a straightforward process, though specific mechanisms can vary slightly between models. Generally, the camera is activated by pressing and holding the power button for a few seconds. This button is often discreetly located on the pen’s clip or body. A small indicator light will illuminate, usually red or blue, to confirm the camera is active.
To deactivate the camera, repeat the process – press and hold the power button for several seconds until the indicator light turns off. Some models may feature an automatic shut-off function to conserve battery life if left idle for a specified period. Always ensure the camera is fully powered off when not in use to prevent accidental recording and preserve battery.
Important Note: Refer to your specific model’s documentation for precise instructions, as some pens may utilize different button configurations or require a sequence of presses. A quick press might save a file, while a long press activates or deactivates the device.
Video Recording Mode
Entering video recording mode is usually initiated after powering on the device. Often, a short press of the power button, following the initial power-on sequence, will activate recording. The indicator light will typically change its flashing pattern – perhaps from a slow blink to a rapid one – to signify active recording. Some models may require a separate “record” button.
During recording, maintain a steady hand and ensure adequate lighting for optimal video quality. The pen should be pointed in the desired direction, and avoid obstructing the lens. To stop recording, press the power or record button again. The camera will usually save the video file automatically, indicated by a brief light flash or a change in the indicator light’s behavior.
Important Considerations: Be mindful of the remaining storage space on your Micro SD card. Recording will cease when the card is full. Regularly check the card’s capacity to avoid interrupted recordings; Always test the recording function before relying on it for critical surveillance.
Adjusting Video Resolution
Video resolution significantly impacts both file size and video clarity. Most spy pen cameras offer multiple resolution options, typically including 720p, 1080p, and sometimes even higher. Adjusting this setting is often done through the userconfig.txt file, which requires connecting the pen camera to a computer via USB.
To modify the resolution, open the userconfig.txt file with a text editor (like Notepad). Locate the line specifying the video resolution and change the value to your desired setting. Save the file and safely eject the camera from your computer. The new resolution will be applied upon the next recording.
Higher resolutions (like 1080p) provide sharper images but consume more storage space. Lower resolutions (like 720p) conserve space but result in less detailed video. Consider your storage capacity and desired video quality when selecting a resolution. Experiment to find the optimal balance for your needs. Remember to test the new setting before relying on it.

Time and Date Settings
Accurate time and date stamping on your recordings is crucial for evidence and organization. Most spy pen cameras don’t allow direct setting adjustments on the device itself. Instead, configuration is typically managed through the userconfig.txt file, accessed by connecting the camera to a computer via USB.
To set the time and date, open the userconfig.txt file using a text editor (like Notepad). Locate the lines designated for date and time settings. Modify these values to reflect your current time zone and desired date format (often MM/DD/YYYY or DD/MM/YYYY). Save the changes and safely eject the camera.
Synchronization is key; ensure your computer’s date and time are accurate before modifying the userconfig.txt file. Incorrect computer settings will result in inaccurate timestamps on your recordings. Verify the changes by recording a short test video and checking the timestamp in the resulting file. Proper time and date settings enhance the usability and credibility of your footage.
Taking Still Photographs
Switching to photograph mode on your spy pen camera is usually achieved through a specific button press sequence. Consult your camera’s specific manual, as the method varies between models. Typically, it involves a short press of the power/record button while the device is powered on. A visual indicator, like a flashing light, often confirms the change to photo mode.
To capture a still image, press the same button once more. The camera will briefly flash or emit a sound (which can often be disabled in settings) to indicate a successful capture. The resolution of the photographs can sometimes be adjusted via the userconfig.txt file, offering options for higher detail or smaller file sizes.
Reviewing photos requires connecting the camera to a computer. The images will be stored on the Micro SD card alongside your video recordings, usually in JPEG format. Ensure sufficient SD card space for storing numerous photographs. Remember to check the image quality after taking a test photo to confirm settings are optimal.
File Transfer to Computer
Transferring files from your spy pen camera to a computer is generally a straightforward process utilizing a USB connection. First, ensure the camera is powered off before connecting it to your computer using the provided USB cable. The camera will typically appear as a removable drive in your computer’s file explorer (Windows) or Finder (Mac).
Accessing the files involves navigating this drive. You’ll find video recordings and still photographs stored in designated folders, often labeled with dates or file types. Copy these files to a desired location on your computer for safekeeping and viewing.
Safely ejecting the camera is crucial to prevent data corruption. Use the “Safely Remove Hardware” option in Windows or drag the drive to the Trash in macOS before disconnecting the USB cable. Some cameras may require specific drivers (see section on driver installation) for proper recognition. The userconfig.txt file does not directly impact file transfer, but ensures correct date/time stamps.
Connecting via USB
Establishing a USB connection is fundamental for charging and transferring files from your spy pen camera. Locate the micro-USB port on the camera – typically found near the pen’s clip or end. Carefully insert the smaller end of the provided USB cable into this port.
Connect the larger USB end to a compatible port on your computer. The camera should be recognized as a removable storage device. If it doesn’t appear immediately, try a different USB port or restart your computer. Ensure the USB cable is securely connected at both ends.
Driver installation might be necessary for initial recognition (see dedicated section). Once connected, the camera can be used for charging or accessing files. Remember to power off the camera before connecting it to avoid potential data issues. The userconfig.txt file doesn’t affect the USB connection itself, but proper connection is vital for utilizing its customization options.
Downloading and Installing Drivers (If Necessary)
Driver installation is sometimes required for your computer to properly recognize the spy pen camera when connected via USB. If the camera isn’t recognized as a removable drive, drivers are likely the issue. Typically, drivers aren’t automatically installed, necessitating a manual process.
Locate the drivers – often available on a mini-CD included with the camera, or downloadable from the manufacturer’s website. Search for drivers specifically for your camera model. Download the appropriate version for your operating system (Windows, macOS).
Run the downloaded file, following the on-screen instructions. You may need administrator privileges. The installation process usually involves accepting license agreements and selecting an installation directory. After installation, restart your computer. Reconnect the camera; it should now be recognized. If problems persist, ensure the driver is compatible and try reinstalling. The userconfig.txt file doesn’t influence driver installation.
Locating Recorded Files
Accessing your recordings is straightforward once the spy pen camera is connected to your computer via USB. The camera will typically appear as a removable drive, similar to a USB flash drive, in your computer’s file explorer (Windows) or Finder (macOS).
Navigate the drive to find a folder, often named “DCIM” or simply labeled with a number. Within this folder, you’ll discover the video and photo files. Videos are usually saved in .AVI or .MP4 format, while photos are typically .JPG. The userconfig.txt file doesn’t contain recorded files.
File names often include the date and time the recording was made, aiding in organization. If you encounter difficulty locating the files, ensure the Micro SD card is properly inserted and formatted. Some cameras may create multiple folders; check each one. Remember to safely eject the camera from your computer before disconnecting to prevent data corruption.
Userconfig.txt File – Customization Options
The userconfig.txt file, a crucial element for advanced users, allows customization of your spy pen camera’s settings. This text file, placed on the Micro SD card, controls various functions beyond the camera’s basic interface.
Common settings include adjusting the video resolution, setting the date and time, and configuring recording loops. You can modify parameters like video quality, frame rate, and even enable or disable audio recording. Editing requires a simple text editor (Notepad on Windows, TextEdit on macOS).
Carefully review the camera’s documentation or online resources for a complete list of available commands and their syntax. Incorrectly modifying the file can render the camera inoperable. Always back up the original userconfig.txt before making changes. After editing, save the file and reinsert the SD card into the camera for the new settings to take effect.
Troubleshooting Common Issues
Encountering problems? This section addresses frequent issues with your spy pen camera. A low battery indicator often signals the need for a full recharge via the USB connection. If the camera isn’t recognizing the SD card, ensure it’s properly inserted and formatted (FAT32 is typically required). Try a different SD card to rule out a card failure.
Poor video quality can stem from insufficient lighting or incorrect resolution settings. Adjust the camera’s position for better illumination and experiment with different resolution options in the userconfig.txt file. If the camera freezes, try resetting it by briefly disconnecting and reconnecting the power source.
Remember to consult the full manual for detailed solutions. If problems persist, contact customer support, providing specific details about the issue and the steps you’ve already taken. Regular firmware updates (if available) can also resolve bugs and improve performance.
Low Battery Indicator
Recognizing the signal: Your spy pen camera features a low battery indicator to alert you when recharging is needed. This is typically displayed as a flashing red light, or a specific icon on some models. Ignoring this warning can lead to interrupted recordings or loss of saved data.
Charging procedure: To recharge, connect the pen camera to a computer using the provided USB cable. A solid red light usually indicates charging is in progress. Allow sufficient time for a full charge – typically 2-3 hours – before resuming operation. Avoid using the camera while it’s charging, as this can potentially damage the battery.
Battery life optimization: To extend battery life, reduce video resolution, disable unnecessary features, and avoid prolonged recording sessions. Fully discharging the battery before recharging isn’t necessary with modern lithium-ion batteries; frequent top-ups are perfectly acceptable.
Camera Not Recognizing SD Card
Troubleshooting steps: If your spy pen camera fails to recognize the inserted Micro SD card, several solutions can be attempted. First, ensure the SD card is properly seated in the slot. Remove and reinsert it, applying gentle pressure. Verify the SD card is compatible – check the camera’s specifications for supported capacities and types (e.g., Class 10, UHS-I).
Formatting the card: A corrupted SD card can cause recognition issues. Format the card within the camera if possible. If not, format it on a computer using the FAT32 file system. Important: Formatting erases all data on the card, so back up any important files beforehand.
Card integrity: Test the SD card in another device (e.g., card reader) to confirm it’s functioning correctly. If the card isn’t recognized elsewhere, it may be faulty and require replacement. Avoid using damaged or low-quality SD cards, as they can lead to unreliable performance.
Poor Video Quality Solutions
Addressing blurry footage: If your spy pen camera produces poor video quality, several factors could be at play. First, ensure the lens is clean and free of smudges or obstructions. Gently wipe it with a soft, lint-free cloth. Adjusting resolution is crucial; higher resolutions (e;g., 1080p) generally offer better clarity, but require more storage space.
Lighting conditions: Insufficient lighting significantly impacts video quality. Ensure adequate illumination in the recording environment. Avoid pointing the camera directly at bright light sources, which can cause glare and washed-out images. Experiment with different angles to optimize light capture.
SD card speed: A slow SD card can limit the camera’s ability to record high-quality video smoothly. Use a Class 10 or UHS-I SD card for optimal performance. Finally, check the userconfig.txt file for any settings affecting video quality and adjust accordingly.
Safety Precautions and Legal Considerations
Responsible Use: Prioritize ethical and legal compliance when using your spy pen camera. Always be aware of and adhere to local laws regarding audio and video recording. Recording conversations without consent is illegal in many jurisdictions. Respect privacy and avoid recording in areas where individuals have a reasonable expectation of privacy, such as bathrooms or bedrooms.
Device Handling: Avoid exposing the camera to extreme temperatures or moisture, which can damage the internal components. Do not attempt to disassemble or repair the device yourself; this will void the warranty and could pose a safety risk. Use only the provided USB cable for charging and data transfer.
Data Security: Protect recorded files from unauthorized access. Consider encrypting sensitive data or storing it in a secure location. Be mindful of potential legal ramifications associated with the use of recorded evidence.
Extended Battery Life Tips
Optimize Recording Settings: Lowering the video resolution significantly extends battery life. While 1080p offers superior clarity, 720p or even lower resolutions can provide sufficient footage for many applications, conserving power. Disable features like looping recording if not essential.
Minimize Usage: Only activate the camera when actively needed. Frequent starting and stopping consume more power than continuous recording. Utilize the device’s automatic shut-off feature if available, preventing unnecessary battery drain when idle.
Storage Considerations: A full Micro SD card can impact performance and battery life. Regularly transfer files to your computer to free up storage space. Ensure the SD card is properly formatted for optimal efficiency. Full Charge: Always fully charge the device before extended use. Avoid interrupting the charging process.