
Stanley Light Timer Instructions: A Comprehensive Guide
Welcome! This guide provides detailed instructions for various Stanley light timers, covering setup, programming, troubleshooting, and safety – ensuring effortless automation of your lighting needs.
Understanding Your Stanley Light Timer
Stanley light timers are designed to simplify your life by automating your lighting, both indoors and outdoors. These devices offer convenience and security, mimicking occupancy while you’re away or ensuring lights switch on automatically at dusk.
Different models cater to varying needs – from basic darkness-sensing timers like the 31198, ideal for holiday lights, to more advanced digital timers such as the 51217, offering customizable schedules and countdown features. Understanding your specific model’s features is crucial for optimal use.

The timers operate silently, providing a seamless experience, and are built with user-friendly interfaces for easy programming.
Key Features and Benefits
Stanley light timers boast several key features, including automated on/off scheduling, darkness-sensing capabilities via photocells, and convenient countdown timer functions. These features translate into significant benefits for users.
Enjoy enhanced home security by simulating occupancy, deterring potential intruders. Save energy and reduce electricity bills by ensuring lights aren’t left on unnecessarily. Simplify holiday decorating with automated lighting schedules.
The timers’ silent operation ensures minimal disruption, while the intuitive interfaces make programming straightforward. Models like the Select Twin offer dual outlet control, maximizing convenience.
Model Numbers and Variations
Stanley offers a range of light timers to suit diverse needs. Popular models include the Stanley 31198, a 2-outlet darkness-sensing timer ideal for simple automation. For more advanced control, the Stanley 51217, a Digital Light Timer Select Outdoor Timer, provides expanded programming options.
The Select Twin Outdoor model offers dual outlet functionality, perfect for coordinating multiple lights. Each model varies in features, such as digital displays, programmable schedules, and photocell sensitivity. Understanding these variations is crucial for selecting the timer best suited for your specific application and requirements.
Stanley 31198: 2-Outlet Darkness-Sensing Timer
The Stanley 31198 is a user-friendly timer designed to automatically turn lights on at dusk and off at dawn. Its built-in photocell detects ambient light levels, eliminating the need for manual programming of on/off times. This 2-outlet timer is perfect for holiday decorations or security lighting.
Simple to use, it requires no complex setup. Just plug in your lights, and the timer handles the rest! It’s an excellent choice for those seeking a straightforward, energy-saving solution for outdoor lighting control. Weighing only 5 ounces and measuring 5 x 3 x 2 inches, it’s compact and easy to position.
Stanley 51217: Digital Light Timer Select Outdoor Timer
The Stanley 51217 Digital Light Timer Select Outdoor Timer offers advanced control over your outdoor lighting. Experience effortless timing for holiday decorations or garden watering systems with this versatile device. It operates silently, blending seamlessly into your outdoor environment.
This timer features an intuitive interface for easy programming of on/off schedules. It’s designed for convenience, allowing you to customize your lighting to suit your needs. Enjoy peace of mind knowing your lights are automated, enhancing security and saving energy. It’s a smart solution for modern outdoor living.
Initial Setup and Installation
Before programming, proper setup is crucial. Begin by carefully unpacking your Stanley light timer and inspecting it for any damage. Ensure the timer is placed in a dry, sheltered location, especially for outdoor models like the 51217.
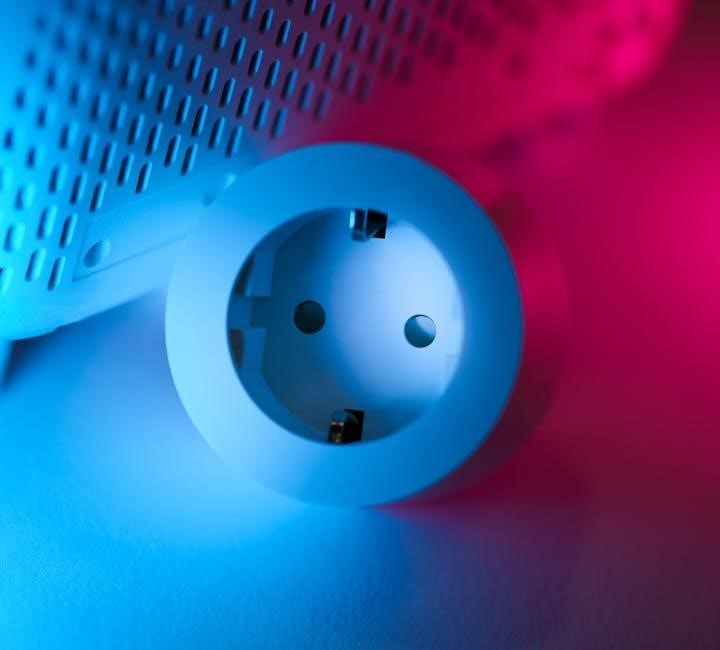
Next, connecting to a power source is the first step. Plug the timer into a standard electrical outlet. Avoid using extension cords if possible. Once powered, you can then attach lights or devices to the timer’s outlets, ensuring the combined wattage doesn’t exceed the timer’s maximum rating for safe operation.

Connecting to a Power Source
To begin, locate a standard electrical outlet suitable for your Stanley timer. It’s best to avoid using extension cords, as they can reduce power efficiency and potentially create a safety hazard. Carefully plug the timer directly into the outlet, ensuring a secure connection.
For outdoor models, confirm the outlet is weatherproof or protected from the elements. Do not operate the timer if the power cord is damaged. Always verify the voltage of the outlet matches the timer’s specifications, typically 120V. A stable power source is essential for reliable operation.
Attaching Lights or Devices
Once the Stanley timer is powered, connect your lights or desired devices to the timer’s outlets. Ensure the total wattage of connected devices does not exceed the timer’s maximum load capacity – check the specifications! For outdoor use, utilize lights specifically rated for outdoor conditions;
Securely plug each item into the outlets, confirming a snug fit. Avoid overloading the timer, as this could cause a malfunction or pose a fire risk. If using holiday decorations, verify they are UL-listed for safety. Proper connection ensures reliable and safe operation.
Programming the Timer: Basic Operations
Basic Stanley timer programming typically involves setting desired on and off times. For simple models, this might involve sliding switches or rotating dials to indicate active hours. Digital timers offer more precise control via button presses and a display screen. Consult your specific model’s instructions for detailed steps.

Generally, you’ll define when the lights should turn on and when they should turn off. Some timers allow multiple on/off cycles per day. Remember to confirm the correct AM/PM settings. Test your programmed schedule to ensure it functions as intended, providing automated lighting control.
Setting the Current Time and Date (If Applicable)
Digital Stanley light timers, like the 51217, require accurate time and date settings for proper scheduling. Typically, a “Set” or “Program” button initiates this process. Use the hour and minute buttons to adjust the current time, paying close attention to AM/PM indicators. Date setting follows a similar procedure – month, day, and year.
Incorrect time or date settings will cause scheduling errors. Refer to your model’s manual for specific button functions and display readings. Some timers automatically synchronize with the current time after initial setup, simplifying this step. Verify the accuracy after initial configuration.
On/Off Scheduling: Simple Timers
For basic Stanley timers, like the 31198, scheduling involves defining “on” and “off” times. Locate the program buttons – often labeled “Set,” “Timer,” or similar. Press these to enter programming mode. Then, input the desired “on” time (when you want the lights to activate) and the “off” time (when they should turn off).
These timers usually operate on a daily cycle. Ensure the correct AM/PM settings are selected. Some models allow multiple on/off cycles per day. Review your settings carefully before finalizing to guarantee the lights operate as intended. Simple, yet effective automation!
Advanced Programming Options
Stanley timers, particularly the Select Outdoor 51217, offer enhanced features. The photocell function automatically activates lights at dusk and deactivates them at dawn, ideal for outdoor use. Explore the countdown timer, perfect for temporary lighting displays – set a duration, and the timer will run for that period before switching off.
Digital models often allow customized schedules for different days of the week. Utilize these options for varied lighting needs. Remember to consult your specific model’s manual for detailed instructions on accessing and configuring these advanced settings for optimal performance.
Using the Photocell Function (Darkness Sensing)

Stanley timers equipped with a photocell, like the Select Twin Outdoor, automatically respond to ambient light levels. Ensure the photocell isn’t obstructed for accurate darkness detection. This feature eliminates manual switching, turning lights on at dusk and off at dawn. The timer activates when the photocell senses diminishing light, providing convenient, energy-efficient operation.
Adjust sensitivity settings, if available, to fine-tune activation thresholds. Proper placement is crucial; avoid direct light sources. This function simplifies outdoor lighting control, enhancing security and convenience without manual intervention.
Countdown Timer Feature Explained
The Stanley LightTimer Select Twin boasts a convenient countdown timer, ideal for temporary lighting needs like holiday decorations. This feature allows you to pre-set a specific duration for your lights to remain on, after which they’ll automatically switch off. Simply select your desired runtime – from minutes to hours – and the timer handles the rest.

This eliminates the need to remember to manually turn off lights, saving energy and providing peace of mind. It’s perfect for festive displays or temporary outdoor illumination, offering automated control and convenience.
Troubleshooting Common Issues
Encountering problems with your Stanley light timer? Common issues include the timer failing to turn lights on or off as scheduled. First, verify the correct program settings and ensure the current time and date (if applicable) are accurate. If using the photocell, confirm it isn’t obstructed.
For a non-functioning photocell, check for dirt or debris and ensure sufficient ambient light. If issues persist, try resetting the timer or replacing the batteries. Always double-check power connections and device compatibility before seeking further assistance.
Timer Not Turning Lights On/Off
If your Stanley timer isn’t activating your lights, begin by meticulously reviewing the programmed on/off schedule. Confirm the current time and date are correctly set, as inaccurate timing is a frequent cause. Ensure the connected lights are functioning properly by testing them directly with a power outlet.
Check the timer’s power source and verify a secure connection; For models with a photocell, disable it temporarily to rule out light sensor interference. If the problem continues, a reset of the timer might resolve the issue; consult the manual for specific reset instructions.
Photocell Not Functioning Correctly
If the photocell on your Stanley timer isn’t responding to ambient light levels, first ensure it isn’t obstructed by shadows or direct light sources. Clean the photocell sensor gently with a soft, dry cloth to remove any dust or debris. Verify the photocell function is enabled within the timer’s settings; some models allow disabling it.
Test the timer in a completely dark environment to confirm the photocell triggers the lights. If it still fails, the sensor may be defective, requiring timer replacement. Remember, overcast days can affect photocell sensitivity.

Safety Precautions and Warnings
Important: Always disconnect power before installing or servicing your Stanley light timer. Do not exceed the timer’s maximum wattage rating, as this could create a fire hazard. Ensure the timer is used with properly grounded outlets and appliances. Avoid using outdoors unless the timer is specifically rated for outdoor use (like the 51217 model).
Keep the timer away from water and extreme temperatures. Never disassemble or attempt to repair the timer yourself; contact a qualified electrician for assistance. This device is not intended for use by children.
Replacing Batteries (If Applicable)

Open the compartment and replace the old batteries with new ones of the correct type (refer to the timer’s label). Ensure correct polarity (+ and -). Low batteries can cause programming errors or timer malfunction. Dispose of old batteries responsibly.
Understanding the Indicator Lights
Stanley light timers utilize indicator lights to communicate their operational status. A steady power light confirms the timer is receiving electricity. A flashing program or set light indicates the timer is in programming mode, or settings are being adjusted.
On darkness-sensing models, a light sensor indicator shows when the photocell is active. Some timers have an override indicator, signaling manual control is engaged. Refer to your specific model’s manual for a complete explanation of each light’s meaning, as variations exist between models.
Technical Specifications
Stanley light timers boast varied specifications depending on the model. The Stanley 31198 (2-Outlet Darkness-Sensing Timer) weighs approximately 5 ounces and measures 5 x 3 x 2 inches. Its part number is 31198. The Stanley 51217 (Digital Light Timer Select Outdoor Timer) specifications differ, but generally, these timers are designed for standard 120V outlets.
Weight and dimensions vary slightly. Always consult the product packaging or the manufacturer’s website for the most accurate and up-to-date technical details for your specific Stanley timer model.
Part Number Details
Understanding Stanley light timer part numbers is crucial for identifying the correct model and accessing specific documentation. For instance, the Stanley 2-Outlet Darkness-Sensing Timer is identified by part number 31198. The Digital Light Timer Select Outdoor Timer carries the part number 51217.
These numbers are essential when contacting customer support, ordering replacement parts, or searching for compatible accessories. Always verify the part number on your device or packaging to ensure you have the correct information. Incorrect part numbers can lead to compatibility issues or delays in assistance.
Item Weight and Dimensions
Knowing the item weight and dimensions of your Stanley light timer is helpful for shipping, storage, and installation planning. The Stanley 31198 model, the 2-Outlet Darkness-Sensing Timer, weighs approximately 5 ounces. Its product dimensions are 5 x 3 x 2 inches, making it compact and easy to place.
These specifications are important if you’re considering mounting the timer or need to ensure it fits within a specific space. Accurate weight and dimension information also aids in calculating shipping costs when purchasing online or sending for repair.
Frequently Asked Questions (FAQ)
Q: Will the timer work with LED bulbs? A: Yes, Stanley light timers are generally compatible with most LED bulbs, but always check the wattage rating. Q: Can I use this timer outdoors? A: Some models, like the 51217, are specifically designed for outdoor use. Ensure the model is rated for outdoor conditions.
Q: How do I reset the timer? A: Reset procedures vary by model; consult the specific instructions. Q: What if my timer isn’t turning on? A: Check the power source, batteries (if applicable), and programming settings. For further assistance, see the support section.
Where to Find Additional Support
For comprehensive support regarding your Stanley light timer, begin with the official STANLEY website. Sign up for their email list to receive news, special offers, and tailored support information. While Listex doesn’t directly sell products, they may offer technical resources.
Additionally, explore online retailers where you purchased the timer; many provide customer service and FAQs. Searching online forums and communities dedicated to home automation can also yield helpful tips and troubleshooting advice from other users. Remember to have your model number (e.g., 31198, 51217) ready when seeking assistance.