
Drywall Installation Guide: A Comprehensive Overview (PDF Focus)
Navigating drywall projects requires accessible resources; comprehensive PDF guides from manufacturers like Gold Bond, alongside detailed video tutorials, empower both professionals and DIY enthusiasts.
BEAM Consolidated’s video tutorial and readily available PDFs streamline installation, covering everything from pre-installation checks to finishing techniques for optimal results.
Understanding the process, from framing inspection to taping and mudding, is simplified through these downloadable guides, ensuring a smooth and successful drywall experience.
What is Drywall?
Drywall, also widely recognized as plasterboard or wallboard, represents a fundamental building material in modern construction and renovation projects. Primarily composed of gypsum, it’s formed into panels and utilized for creating interior walls and ceilings. Its popularity stems from its relatively quick and straightforward installation process, offering a less cumbersome alternative to traditional plastering techniques.
Essentially, drywall transforms a bare framework into a smooth, finished surface, providing a foundation for paint, wallpaper, or other decorative finishes. The material’s versatility allows for easy customization and adaptation to various design aesthetics. Understanding its composition and properties is crucial for successful installation, and numerous PDF guides detail these aspects.
These guides often explain how drywall’s gypsum core is encased in paper, contributing to its fire-resistant qualities and providing a suitable surface for joint compound application. It’s a cost-effective solution for creating durable and aesthetically pleasing interior spaces.
Types of Drywall Available
Several drywall types cater to diverse project needs, each with unique properties detailed in comprehensive PDF installation guides. Standard drywall, often called white board, is suitable for general residential applications. Green board, moisture-resistant, is ideal for bathrooms and kitchens, though not for direct shower contact.
Blue board, also moisture-resistant, offers enhanced protection but is less common now. Fire-resistant or Type X drywall contains additives that slow fire spread, crucial for garages and furnace rooms. Lightweight drywall simplifies handling and installation, reducing strain.
Furthermore, specialized options like soundproof drywall minimize noise transmission, while impact-resistant drywall withstands damage in high-traffic areas. Manufacturer PDFs, such as those from Gold Bond, provide specific guidance on selecting the appropriate drywall for each application, ensuring optimal performance and longevity.
Drywall Installation Cost Factors
Estimating drywall installation costs requires considering several variables, often detailed within comprehensive PDF guides and contractor quotes. Labor constitutes a significant portion, varying by region and installer experience. Material costs depend on drywall type – standard, moisture-resistant, or fire-rated – and sheet quantity.
Project complexity impacts pricing; rooms with numerous openings (windows, doors) demand more cutting and fitting, increasing labor. Finishing work – taping, mudding, sanding, and priming – adds to the overall expense. Accessibility also plays a role; difficult access can inflate labor costs.
PDF resources from manufacturers often don’t directly list costs, but understanding material choices helps budgeting. Unexpected repairs to framing or electrical work can add unforeseen expenses, highlighting the importance of thorough pre-installation inspection.

Pre-Installation Checklist
PDF guides emphasize a thorough checklist: framing inspection, tool and material readiness, and strict safety protocols before commencing drywall installation for optimal results.
Tools Required for Drywall Installation
Comprehensive drywall installation PDF guides consistently highlight essential tools for a successful project. A sturdy utility knife is paramount for precise drywall sheet cutting, ensuring clean lines and minimizing waste. A drywall saw proves invaluable for intricate cuts around openings like windows and doors.
Furthermore, a drywall T-square aids in achieving accurate 90-degree angles, crucial for square cuts. A mud pan is necessary for holding and applying joint compound smoothly. Various taping knives, in different widths, are vital for feathering and smoothing the mud.
Essential power tools include a drywall screw gun, designed for efficient screw driving, and a sanding pole with sandpaper for achieving a flawless finish. Don’t forget safety glasses and a dust mask, frequently mentioned in PDF safety sections!
Materials Needed for Drywall Installation
Drywall installation PDF guides emphasize acquiring the correct materials upfront. Naturally, drywall sheets themselves – available in various thicknesses and sizes – are fundamental. Drywall screws, specifically designed to avoid tearing the paper face, are crucial; choosing the right type prevents project failures.
Joint compound (mud), in all-purpose or lightweight varieties, is essential for taping and finishing seams. Paper or mesh drywall tape reinforces these seams, preventing cracking. Primer is needed to prepare the drywall for paint, ensuring proper adhesion.
Additionally, corner bead protects vulnerable drywall corners. Finally, consider materials for patching any potential damage – small pieces of drywall and extra mud. Reliable PDFs often include material lists for different project sizes.
Safety Precautions During Installation
Drywall installation PDF guides consistently prioritize safety. Wearing dust masks or respirators is paramount, as drywall dust can irritate lungs. Safety glasses protect eyes from flying debris during cutting and screwing. Gloves shield hands from abrasions and potential cuts from drywall edges.
Proper lifting techniques are vital to prevent back injuries; drywall sheets are heavy! Utilizing a drywall lift can significantly reduce strain. Be mindful of electrical wiring and plumbing within walls before cutting.
Ensure adequate ventilation in the work area. Finally, always follow the manufacturer’s safety recommendations detailed in their PDF installation guides, and disconnect power to the area before working near electrical outlets.

Installation Process: Step-by-Step
PDF guides detail a sequential process: framing inspection, precise drywall measurement and cutting, careful hanging (vertical or horizontal), and addressing openings.
Staggering joints and proper screw placement, as outlined in these guides, are crucial for a structurally sound and visually appealing finished wall.
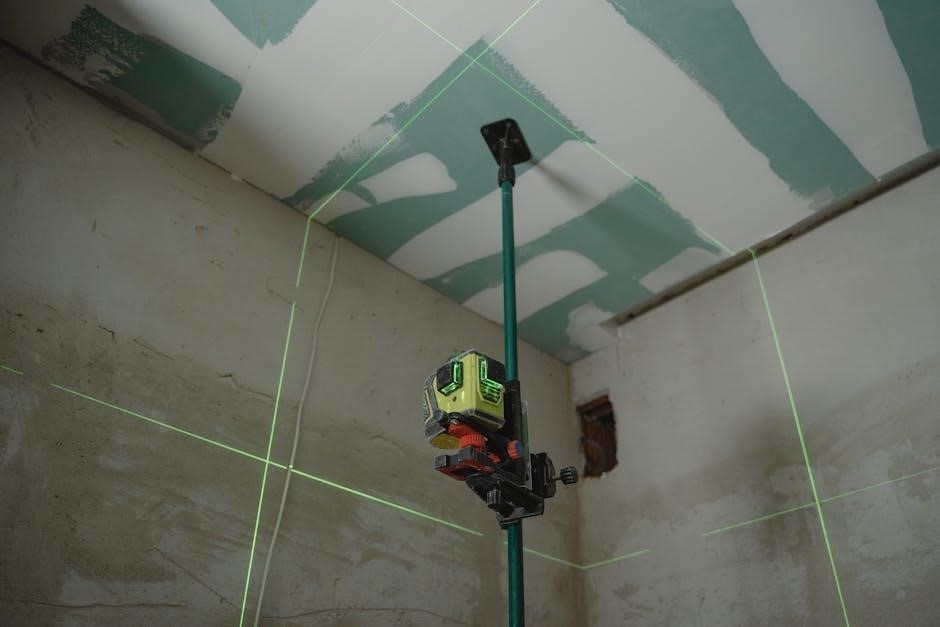
Framing Inspection and Preparation
Before commencing drywall installation, comprehensive PDF guides emphasize a thorough framing inspection as paramount. Verify all framing members are structurally sound, plumb, square, and securely fastened, ensuring a solid base for drywall application.
Guides highlight checking for protruding nails or screws, correcting any inconsistencies, and confirming proper spacing – typically 16 or 24 inches on center – to prevent future issues like cracking.
Addressing electrical wiring and plumbing within the framing is also crucial; ensure these are properly secured and protected, adhering to local building codes as detailed in installation PDFs.
Preparation includes cleaning the framing of debris and ensuring a level surface, contributing to a smoother drywall finish and preventing potential adhesion problems, as illustrated in manufacturer guides.
Measuring and Cutting Drywall Sheets
Drywall installation PDF guides consistently stress precise measurement and cutting for a professional finish. Begin by accurately measuring the wall dimensions, accounting for openings like windows and doors, and transferring these measurements onto the drywall sheets.
Utilize a utility knife and a straight edge to score the paper face of the drywall, then snap the sheet along the scored line. PDFs recommend a firm, controlled snap for clean breaks, minimizing crumbling.
For intricate cuts around outlets or pipes, employ a drywall saw, carefully following the marked outlines. Guides emphasize cutting slightly larger than needed, allowing for fine adjustments during installation.
Always wear safety glasses and a dust mask during cutting, as drywall dust can be irritating. Detailed diagrams within PDFs illustrate proper cutting techniques for various scenarios.
Hanging Drywall Sheets: Vertical and Horizontal
Drywall installation PDF guides detail both vertical and horizontal hanging techniques, often recommending a combination for stability. Typically, starting with the bottom row, maintain a half-inch gap from the floor to prevent moisture damage, as highlighted in several guides.
Lift sheets into place, ensuring they are flush against the framing. PDFs emphasize the importance of staggering vertical joints to enhance strength and minimize cracking.
When hanging, support the drywall to prevent sagging before securing it with screws. Guides often illustrate proper lifting techniques to avoid strain and damage.
Manufacturer’s PDFs, like those from Gold Bond, often demonstrate specific hanging procedures for their products, optimizing performance and warranty coverage.
Dealing with Outlets, Windows, and Doors
Drywall installation PDF guides consistently address navigating obstacles like outlets, windows, and doors. Precise measurements and careful cutting are crucial; guides often include diagrams illustrating how to accurately mark and cut openings.
For outlets and windows, cut slightly undersized and then fine-tune the fit. PDFs emphasize the importance of leaving enough support around electrical boxes for secure mounting.
Around door frames, ensure a snug fit, leaving minimal gaps for easy trimming. Many guides recommend using a drywall saw for clean, controlled cuts.
Manufacturer’s PDFs may offer specific recommendations for their drywall products when working around these features, ensuring a professional finish and structural integrity.
Drywall Spacing and Staggering Joints
Drywall installation PDF guides universally stress the importance of proper spacing and staggering joints for a structurally sound and visually appealing wall. Typically, sheets are installed horizontally or vertically, depending on framing direction.
Staggering joints – avoiding continuous seams – is paramount to prevent cracking. PDFs illustrate how to offset end joints by at least 24 inches on adjacent rows.
Maintaining a consistent gap (around 1/8 to 1/4 inch) between sheets allows for expansion and contraction, minimizing future issues. Guides detail how to achieve this spacing accurately.
Manufacturer’s PDFs often provide specific recommendations based on the drywall thickness and intended application, ensuring optimal joint stability and a smooth finish.
Fastening Drywall
PDF guides emphasize selecting the correct drywall screws, spacing them appropriately, and employing proper driving techniques to avoid breaking or stripping screws for secure attachment.
Choosing the Right Drywall Screws
Detailed PDF guides consistently highlight the critical importance of selecting appropriate drywall screws for a successful installation. Utilizing incorrect screws can lead to a cascade of problems, including breakage during driving, premature rusting, slippage within the drywall, and ultimately, a compromised project quality.
Manufacturers’ installation resources, such as those from Gold Bond, often specify screw gauge and length based on drywall thickness and framing material. Choosing phosphate-coated screws is generally recommended for corrosion resistance, especially in areas with higher humidity. Avoid using standard wood screws, as their threading isn’t designed for gypsum board and can cause crumbling.
PDFs also caution against overdriving screws, which weakens the drywall’s surface, and underdriving, which leaves a protruding head. Proper screw selection, as detailed in these guides, is foundational for a durable and professional finish.
Screw Spacing Guidelines
Comprehensive PDF installation guides emphasize precise screw spacing for optimal drywall performance and structural integrity. Generally, screws should be spaced 12 inches apart along studs and joists, but this can vary based on drywall thickness and application.
Manufacturer resources, like those from Gold Bond, often detail specific spacing recommendations for their products. For example, thicker drywall may require closer spacing to prevent flexing or cracking. Guides also address perimeter screw spacing, typically 8-10 inches, to secure edges effectively.
Consistent spacing, as illustrated in these PDFs, ensures even distribution of support and minimizes the risk of nail pops or screw failures. Following these guidelines, readily available in downloadable formats, is crucial for a long-lasting, professional drywall installation.
Proper Screw Driving Techniques
Detailed PDF guides consistently highlight the importance of correct screw driving techniques for successful drywall installation. Crucially, screws should be driven just below the surface of the drywall, creating a slight dimple without breaking the paper face.
Manufacturer instructions, often found within downloadable PDFs, recommend using a dimpler tool to achieve this consistently. Overdriving screws weakens the drywall and can lead to issues like popping or crumbling. Conversely, screws that aren’t driven deep enough won’t hold the drywall securely.
These guides also emphasize using the correct clutch setting on your drill to prevent damage. Proper technique, as illustrated in these resources, ensures a smooth, durable finish and avoids costly repairs down the line.

Taping and Mudding
PDF guides detail applying joint compound (mud) and taping seams for a flawless finish; mastering these techniques ensures smooth walls and ceilings, vital for quality.
Downloadable resources illustrate proper sanding methods, crucial for eliminating imperfections and preparing surfaces for paint or texture, enhancing project outcomes.
Applying Joint Compound (Mud)
Comprehensive PDF guides emphasize the importance of proper joint compound application for achieving seamless drywall finishes. These resources detail various mud types – all-purpose, lightweight, and setting compounds – explaining their specific uses based on seam size and project needs.
Detailed instructions outline techniques for embedding tape, feathering edges, and building up layers to conceal screws and create a smooth, even surface. PDFs often include diagrams illustrating correct knife angles and pressure for optimal mud distribution.
Furthermore, guides highlight the necessity of allowing each coat to dry completely before sanding, preventing cracking and ensuring a durable finish. They also address common issues like shrinkage and blistering, offering solutions for a professional-looking result. Mastering mud application, as shown in these guides, is key to a successful drywall project.
Taping Drywall Seams
Reliable PDF guides stress that proper drywall taping is crucial for concealing seams and creating a flawless surface. They detail the two primary taping methods: paper tape and mesh tape, outlining the advantages and disadvantages of each for different applications.
Step-by-step instructions, often accompanied by illustrative diagrams within the PDFs, demonstrate how to embed the tape into a thin layer of joint compound, ensuring full adhesion and preventing future cracking. Guides emphasize consistent pressure and avoiding air bubbles.
Moreover, these resources explain the importance of corner taping techniques for both inside and outside corners, achieving clean, professional results. They also address common taping errors and provide troubleshooting tips for a durable and visually appealing drywall finish, vital for long-lasting walls.
Sanding Drywall for a Smooth Finish
Comprehensive PDF guides consistently highlight sanding as a pivotal step towards achieving a professional-grade drywall finish. They detail the appropriate sandpaper grits – starting coarser to remove imperfections and progressing to finer grits for smoothing – and emphasize the importance of using a sanding block or pole sander for even pressure.
These resources often include warnings against over-sanding, which can damage the paper face of the drywall. PDFs illustrate proper sanding techniques, including feathering edges to blend repairs seamlessly with the surrounding surface.
Furthermore, guides stress the necessity of dust control, recommending the use of dust masks and shop vacuums to maintain a safe and clean work environment. They also advise inspecting the sanded surface with a bright light to identify any remaining imperfections before priming.
Finishing Touches
PDF guides emphasize priming drywall to seal the surface, ensuring optimal paint adhesion and a uniform finish; texturing or painting completes the project beautifully.
Manufacturer PDFs detail specific primer and paint recommendations, maximizing durability and aesthetic appeal for long-lasting, professional results.
Proper finishing, as outlined in these guides, transforms installed drywall into a polished, ready-to-enjoy living space.
Priming Drywall
Priming drywall is a crucial step often detailed extensively within comprehensive installation PDF guides. It seals the porous gypsum surface, creating a uniform base for paint or other wall coverings. This process significantly improves adhesion, preventing the paint from being absorbed unevenly into the drywall, which can lead to a blotchy or inconsistent finish.
Manufacturer PDFs, such as those from Gold Bond, often recommend specific primer types suited for their drywall products. These recommendations ensure compatibility and optimal performance. Applying primer also enhances the durability of the paint job, making it more resistant to scuffs, scratches, and moisture. Furthermore, priming helps to conceal minor imperfections and repairs made during the taping and mudding stages, contributing to a smoother, more professional-looking final result.
Detailed PDF guides will also outline proper application techniques, including brush, roller, or spray methods, and recommended drying times before proceeding to the painting phase.
Painting or Texturing Drywall
Following priming, painting or texturing drywall transforms the space, and detailed PDF guides often dedicate sections to these finishing touches. Guides emphasize selecting appropriate paints – latex or oil-based – based on desired sheen and room function. They also detail application techniques, recommending multiple thin coats for even coverage, avoiding thick layers that can crack or peel.
For textured finishes, PDFs from manufacturers provide guidance on various methods, including orange peel, knockdown, or swirl patterns. These guides explain the necessary tools and techniques for achieving the desired effect, ensuring a consistent and professional look. Proper preparation, including taping off areas and protecting surfaces, is also highlighted.
Comprehensive installation PDFs often include troubleshooting tips for common painting issues, like brush marks or uneven color, ensuring a flawless final result and long-lasting beauty.
Troubleshooting Common Issues
PDF guides detail solutions for problems like protruding screws, cracks, or bulging; they offer repair techniques and preventative measures for lasting drywall integrity.
Dealing with Bulging or Protruding Screws
Comprehensive drywall installation PDF guides frequently address the issue of improperly driven screws, a common problem leading to bulging or protrusion. These resources emphasize the importance of correct screw depth – the screw head should be slightly below the drywall surface, creating a dimple that’s easily filled with joint compound.
Guides detail how to rectify overdriven screws; typically, this involves carefully backing the screw out (if possible) and replacing it with a new one, ensuring proper driving technique this time. If the screw is stripped and won’t back out, PDFs recommend gently tapping it further in, then covering it with joint compound.
Furthermore, these guides highlight the dangers of using the wrong type of drywall screw, as this can contribute to breakage or slippage, ultimately causing issues like bulging. Selecting the appropriate screw length and type, as outlined in the PDFs, is crucial for a secure and smooth finish.
Repairing Damaged Drywall
Detailed drywall installation PDF guides dedicate sections to addressing accidental damage, a frequent occurrence during projects. These resources outline repair techniques based on the severity of the damage, ranging from small nail holes to larger punctures or cracks.
For minor damage, PDFs recommend applying joint compound directly to the affected area, feathering it outwards for a seamless blend. Larger holes require patching – cutting away damaged sections, installing a drywall patch, taping the seams, and applying multiple coats of joint compound.
Manufacturer guides, like those from Gold Bond referenced in various PDFs, often include specific product recommendations for repair compounds and tapes. They also emphasize the importance of proper sanding between coats to achieve a smooth, paint-ready surface, ensuring a professional-looking repair.
Addressing Cracks in Drywall
Drywall installation PDF guides frequently address the common issue of cracking, detailing causes like settling, temperature fluctuations, or improper installation. They categorize cracks – hairline, larger settlement cracks, and those around seams – each requiring a different approach.
Hairline cracks are often remedied with a flexible patching compound and multiple thin coats, sanded smooth. Larger cracks necessitate widening the crack slightly, applying mesh tape for reinforcement, and then applying joint compound. PDFs emphasize the importance of using a quality tape to prevent re-cracking.
Seam cracks, often appearing due to movement, require re-taping and mudding. Guides highlight the need to thoroughly inspect the underlying framing for stability. Manufacturer PDFs, like those available for Gold Bond products, offer specific compound recommendations for lasting repairs.

Resources and PDF Guides
Access reliable PDFs from manufacturers like Gold Bond, alongside comprehensive online tutorials, to master drywall installation and ensure a professional, lasting finish.

BEAM Consolidated’s resources and detailed guides provide invaluable support for both DIYers and industry professionals tackling drywall projects.
Finding Reliable Drywall Installation PDFs
Locating trustworthy PDF guides for drywall installation is crucial for project success. Manufacturer websites, such as Gold Bond, offer detailed installation manuals specifically for their products, ensuring compatibility and optimal performance. These guides often include step-by-step instructions, diagrams, and crucial safety information.
Beyond manufacturer resources, reputable construction websites and home improvement retailers frequently provide downloadable PDFs covering various aspects of drywall installation. Look for guides that address framing preparation, drywall hanging techniques, taping, mudding, and finishing procedures.
BEAM Consolidated’s video tutorials are often accompanied by supporting PDF documentation, offering a comprehensive learning experience. Always prioritize guides from established sources and verify the information aligns with local building codes and best practices for a safe and durable installation.
Manufacturer’s Installation Guides (Gold Bond, etc.)
Gold Bond, a leading drywall manufacturer, provides extensive PDF installation guides tailored to their diverse product lines, including XP Gypsum Board. These guides detail pre-installation checklists, proper hanging techniques, and specific recommendations for screw spacing and fastening methods.
These resources emphasize maintaining a half-inch gap from the floor during drywall hanging to prevent moisture damage and ensure a clean finish. Manufacturer guides also cover crucial aspects like dealing with outlets, windows, and doors, offering detailed instructions for precise cutting and fitting.
Accessing these PDFs directly from the manufacturer’s website guarantees the most up-to-date information and ensures compatibility with their products, leading to a professional and long-lasting drywall installation. Utilizing these guides minimizes errors and maximizes project quality.